Last updated November 17, 2026



Free written scope consultation - allowances, timeline, and change-order rules on paper before a single trade is scheduled
The Complete Bathroom Remodeling Guide for Spring Valley Homeowners
The average bathroom remodel in the Las Vegas metro runs 20-35% over the initial budget. Not because tile costs more than expected, and not because the vanity was mispriced. It’s demo day: moisture damage behind the shower wall, galvanized or early polybutylene plumbing that can’t handle a modern fixture load, or a subfloor that was never properly waterproofed under the original tile. In Spring Valley, where a large share of homes went up during the 1980s through early 2000s boom, those discoveries are closer to routine than to bad luck. And every one of them has a tell before you open a wall. This guide shows you how to read those tells, scope your project in the right tier, and know what you’re actually buying before you sign anything.
Quick Answer
A bathroom remodel in Spring Valley typically runs $9,000-$16,000 for a cosmetic refresh, $18,000-$35,000 for a mid-scope fixture and tile replacement, and $40,000-$75,000 for a full gut-and-rebuild with layout changes. The biggest budget swingers in Spring Valley homes aren’t finishes – they’re what demo reveals: plumbing that can’t support modern fixtures, subfloor and waterproofing failures under the original tile, and exhaust venting that was never sized or terminated correctly for a desert climate. Inspect those three things before you collect a single quote.
Styles & brands we work with
- Kitchen remodeling
- Bathroom remodeling
- Home additions & ADU
- Roofing
- Windows & doors
- Driveway & pavers
- Fence
Table of Contents
- Why Bathroom Remodels Fail in Spring Valley
- What to Investigate in a 1980s-2000s Spring Valley Home
- How to Scope a Bathroom Remodel in Three Tiers
- Reading the Signs of Water Damage Before Demo
- Ventilation: The Most Ignored Line Item in Clark County
- A Material Framework Built for Spring Valley Water and Heat
- Permits, Inspections, and What They Protect
- What a Remodel Should Look Like, Step by Step
Why Bathroom Remodels Fail in Spring Valley
Bathrooms fail differently than kitchens. A kitchen is mostly visible: cabinets, counters, appliances, all of it inspectable before anyone swings a hammer. A bathroom hides 60% of its cost behind drywall and under tile. Plumbing chases, drain slope, vent runs, waterproofing membranes, subfloor decking, and the condition of the framing around the shower – none of that is on the drawing. Which is exactly why a bathroom budget built from finish selections alone is a budget built to be broken.
In Spring Valley, that hidden cost runs higher than in newer build areas. The valley’s housing stock matured fast, and a lot of it went up in construction cycles where builder-grade materials were the norm and code interpretation was looser than it is today. Homes from the 1980s and 1990s carry a specific set of known conditions: galvanized supply lines nearing the end of their service life, cast iron drains with accumulated scale, and shower pans that were formed from lead or hot-mopped liners rather than modern bonded membranes. Homes from the late 1990s into the 2000s often have polybutylene or early PEX supply plumbing and builder-grade exhaust fans that were undersized on day one.
The failure pattern we see is consistent. A homeowner gets three quotes, picks the middle one, and the winning bid was priced on the assumption that everything under the tile is sound. Then demo removes the shower surround and finds a rotted curb, or the tile pops off and takes the substrate with it. The contractor’s options are now to eat the cost, stop work and renegotiate, or cut a corner. Two of those outcomes are bad for you and one is bad for them. The fix isn’t a better contractor – it’s a better scope. A line-item bid that includes allowances for known-risk items, an inspection period before final pricing, and a written change-order process. That’s what “upfront pricing, no surprises” actually means in a bathroom.
The good news: the tells exist. Water staining under a vanity, a soft spot in the floor by the toilet, a fan that doesn’t move a tissue, a water heater that’s been replaced twice in ten years, mineral buildup on the shower head that comes back in weeks. Every one of those is a clue about the wall you’re about to open.
What to Investigate in a 1980s-2000s Spring Valley Home
If your Spring Valley home was built between roughly 1980 and 2005, there’s a specific pre-quote investigation worth doing before you collect bids. Not repairs – investigation. The findings become part of the scope, which is how you avoid the surprise.
- Identify the supply plumbing material. Look under a sink for the line feeding the shutoff. Copper, PEX, CPVC, polybutylene, or galvanized steel each carries a different replacement decision. Galvanized and polybutylene are the two that most often force a whole-bath repipe once the wall is open.
- Check the water heater age and type. A tank that’s past 10-12 years in Spring Valley’s hard water is on borrowed time, and a bathroom remodel is the least expensive moment to replace it or add a recirculation loop.
- Test the exhaust fan. Hold a single-ply tissue to the grille. If it won’t hold, the fan is either undersized, clogged, or the duct is disconnected. That last one is common in homes where a roofer or attic contractor worked after the original build.
- Probe for soft subfloor. Step firmly around the toilet base and the shower curb. Any give, any bounce, any squeak beyond the normal is a flag.
- Look for past moisture. Staining on the ceiling below the bathroom, efflorescence on the drywall at the shower’s outside corner, tile that’s popped or grout that keeps cracking along a single line – all indicators of an ongoing leak path.
- Photograph the electrical. GFCI protection in a bathroom is required by code now. Older Spring Valley homes often have a single GFCI in the hall that trips everything, or none at all.
- Get the original permit history. Clark County keeps records. A bathroom that was DIY’d in 1998 with no permit is a bathroom whose plumbing and electrical you should trust less.
None of this is a reason to panic. It’s a reason to know. When a homeowner walks into an estimate having already documented a galvanized stub-out and a dead exhaust duct, the bid is honest on day one. When they don’t, the bid is honest until demo, and the difference is a number that shows up mid-project instead of up front.
How to Scope a Bathroom Remodel in Three Tiers
Most bathroom budget confusion comes from comparing apples to applesauce. A “bathroom remodel” quote can mean anything from new paint and a faucet swap to a full gut with a relocated toilet. Scoping in tiers gives you a real number and a real decision. Here’s how we break it down for Spring Valley homeowners.
Tier 1: Cosmetic Refresh – $9,000-$16,000
This is the same footprint, same plumbing, same layout. New vanity and counter, new faucets and fixtures, a re-glaze or replacement of the tub or shower, paint, lighting, and a mirror. Tile stays unless it’s cracked or failing. This tier works when the existing plumbing pressure and drainage are sound and there’s no sign of moisture behind the walls. In a Spring Valley home from the early 2000s that’s been maintained, this is often the right answer and it finishes in a single visit or a short two-day return.
Tier 2: Mid-Scope Replacement – $18,000-$35,000
Same footprint, new everything visible: new tile floor and shower walls, new shower pan and waterproofing, new fixtures, new vanity, new fan, new GFCI electrical. This is where most Spring Valley bathrooms land. It’s also where the hidden variables live: if demo reveals a failed shower pan or a section of rotted subfloor, that moves the project up. The honest version of a Tier 2 bid includes a stated allowance for unforeseen substrate repair, so the change order is a known quantity, not an ambush.
Tier 3: Full Gut-and-Rebuild – $40,000-$75,000
Everything comes down to the studs and the joists. This tier is unavoidable when you’re moving the toilet, adding a second sink, converting a tub to a walk-in shower, or when the home’s plumbing is at end of life. A layout change means relocating a drain (which is a joist and slope question, not just a plumbing one), moving supply lines, re-running the vent stack, and pulling a more involved set of permits. New framing, new insulation, new membrane, new subfloor. In a Spring Valley 1980s home where the cast iron drain is already on the edge, Tier 3 is often the difference between a bathroom that lasts 20 years and one that comes back in five.
What moves you up a tier: a layout change, failed waterproofing or subfloor, outdated supply plumbing, a dead exhaust duct, an electrical panel without capacity for a GFCI circuit, or a water heater that needs replacement in the same window. Knowing which of those applies to your Spring Valley home before you get quotes is the single highest-leverage step in the whole project.
If your project grows past the bathroom – say a second suite, an ADU, or a full-home repipe – the scope story becomes a different conversation. We cover that path in our guide to Home Additions & ADU in Spring Valley, and the tiering logic applies the same way.
Reading the Signs of Water Damage Before Demo
Water damage in a bathroom is rarely a surprise to a trained eye. It’s a surprise to a homeowner who hasn’t learned what to look for. Here’s what the tells are, and what a good contractor does versus a cheap one.
- Soft spots in the floor near the toilet or tub. Press with a thumb. A subfloor that flexes or sounds hollow is a subfloor that’s been wet.
- Popped or hollow-sounding tile. Tap along the shower wall. A dead “thunk” rather than a tight “click” means the tile has separated from the substrate. That separation is where moisture enters.
- Cracked or missing caulk with dark staining behind it. Every crack is a water intrusion point. Dark staining or a musty smell means it’s been happening for a while.
- Efflorescence or bubbling paint on the wall behind the shower. Mineral deposits or paint that’s lifting is a sign that the back side of that wall is wet.
- A persistent fog or condensation on the mirror that takes more than a few minutes to clear. That’s not just a fan problem – it’s a sign of a bathroom that stays humid, which is a substrate problem over time.
- Staining on the ceiling below the bathroom. From a first-floor half bath or a bathroom over a garage, this is the clearest signal of an active leak path.
- A shower pan that “gives” slightly underfoot. In older Spring Valley homes with lead or hot-mopped pans, this is a sign the pan has failed and is holding water in the wrong place.
What a contractor should do when they find damage: stop, document with photos, show you the findings, and write a change order that includes a line-item for the repair – a specific scope, a specific price, a specific timeline impact. What a cut-rate operator does: skim coat over the soft spot with a floor leveler, screw a backer board over the damaged substrate, and proceed. That second approach costs less today and costs a lot more in three years when the same wall opens up again. Our 730-Day Done Right Promise exists for exactly that reason. If it’s not done right, we make it right – and the workmanship is covered in writing for a stated, non-negotiable window.
The other side of water damage is the one nobody wants to talk about: mold. In Spring Valley’s low-humidity climate, mold grows slower than it does in coastal climates – but the wet season and the high A/C usage mean a failed shower pan in an interior bathroom can trap moisture for months before it’s discovered. If demo reveals visible mold, the right answer is to remediate before rebuilding, not to paint over it. That’s a scope decision and a permit decision, and it’s worth asking about up front.
Ventilation: The Most Ignored Line Item in Clark County
Here’s the failure most Spring Valley homeowners never see coming. A bathroom exhaust fan that moves air to the wrong place. Not a broken fan – a fan that’s running, sounds fine, and is quietly depositing moist air into the attic or crawlspace instead of outdoors. Over a couple of Vegas summers, that’s a moisture problem that cycles daily, then a mold problem, then a rot problem.
The code requirement in Clark County is straightforward: bathroom exhaust must terminate outdoors, and the fan must be rated for the cubic feet per minute (CFM) that the bathroom’s volume requires. The most common size rule is one CFM per square foot of bathroom floor area, with a minimum for smaller rooms. A 5×8 bathroom needs at least 40-50 CFM; a larger primary bath with a separate water closet often needs 80-110. A builder-grade fan installed in 1998 at 50 CFM may be undersized today, and if it’s venting into the attic, it doesn’t matter that it’s running.
What to Check Before You Choose a Fan
- Where does the duct terminate? Go into the attic or crawlspace and trace it. A duct ending in the attic insulation is a duct that ends in the wrong place.
- Is the duct insulated? In a Vegas attic where ambient hits 140°F in July, an uninsulated duct in the attic will sweat. Insulated flex duct is the right material here.
- Is there a backdraft damper at the exterior termination?
- Is the run short? Every 90-degree elbow cuts effective airflow. A fan rated 80 CFM through three elbows and 25 feet of hose is not moving 80 CFM.
- Is the fan rated for continuous use? Bathrooms with an A/C supply but no return benefit from a fan that can run on a timer.
- Is there a timer switch? In Spring Valley’s desert climate, the best practice is to run the fan for 20-30 minutes after a shower, not just while it’s on.
The other piece that matters here is air conditioning. In Spring Valley, most bathrooms run the A/C 8-10 months of the year, and a bathroom with a shower, a tub, and a door that closes is a small air handler doing its own thing. Sealing the bathroom door with a proper undercut, keeping the A/C supply unobstructed, and giving the exhaust fan a way to replace the air it removes all matter. Improper ventilation is the most common cause of long-term mold liability in a bathroom remodel, and it’s also one of the cheapest things to get right. A new fan, insulated ducted properly and terminated through the roof, is a few hundred dollars in materials. Remediating a mold problem three years later is not.
If your roof is at or near replacement age, this is also the moment to inspect the roof penetration where the bathroom vent terminates. Chasing two projects separately is always more expensive than doing the roof work once. Our guide to Groundwork Construction Co. of Spring Valley home covers the related exterior services, and our roofing team can look at the vent termination during the same visit.
A Material Framework Built for Spring Valley Water and Heat
Spring Valley’s water is hard. The Colorado River source that supplies most of the Las Vegas Valley runs high in calcium and magnesium, and it’s the single biggest material consideration for a bathroom remodel here. Hard water is fine on a well-chosen finish and brutal on a badly chosen one. Here’s the framework we use with Spring Valley homeowners.
Hard Water and Tile
Porcelain tile with a matte or lightly textured finish is more forgiving than polished porcelain or natural stone. Polished surfaces show mineral spots immediately and the hard water deposits etch certain marbles. A densified porcelain in a matte finish looks nearly the same and lasts decades. If you want natural stone, expect to seal it annually and accept that a marble shower in Spring Valley will develop a patina over time. For shower floors, a smaller mosaic tile with more grout lines offers better slip resistance. Grout choice matters too: epoxy grout resists both hard water staining and mold better than cementitious grout, and for a shower in a desert climate, it’s a worthwhile upgrade.
Fixtures and Hard Water
Premium finishes matter less than cartridge quality. A faucet with a ceramic disc cartridge tolerates hard water better than a rubber-seated compression faucet, and a shower head with a removable face and silicone nozzles is easier to descale. Kohler, one of our brand partners, builds several models with these features, and the price difference against builder-grade is modest. What you’re buying is time – the years before the first drip.
Vanities and Cabinetry
Bathroom cabinetry lives in a humid environment. KraftMaid and similar lines offer moisture-resistant plywood boxes and finishes engineered for wet rooms. Avoid MDF boxes with a wood-veneer exterior in a primary bath; they swell at the joint where the box meets the floor. A plywood box, a sealed counter seam, and a properly caulked backsplash will last through the next 20 years of showers.
Ventilation and Insulation
The bathroom wall between a shower and an exterior wall needs insulation and a proper vapor strategy. In Vegas, the hot side is the outside, so the vapor barrier goes on the interior face of the exterior wall – not on the back of the shower board. Getting this wrong traps moisture inside the wall cavity. A tile backer board with a bonded waterproofing membrane is the standard; the old method of greenboard behind tile is not acceptable in a wet area today.
Floors and Door Sills
Tile floors in Spring Valley homes take a lot of grit from the desert. A porcelain or luxury vinyl plank with a matte finish handles it better than wood, and both are more waterproof than engineered hardwood – which is fine in a powder room but unwise in a full bath.
The bottom line for materials: durability and low maintenance drive the decision more than appearance, and a good contractor will show you the trade-offs in writing rather than vend a finish. If your project grows into a broader renovation, the same material standards apply. Our guide to Driveway & Pavers in Spring Valley covers the exterior side of the same conversation.
Permits, Inspections, and What They Protect
In Clark County, a bathroom remodel that touches plumbing, electrical, or structural framing requires a permit. A cosmetic refresh – paint, a vanity swap, a faucet replacement – generally does not. The line is reachable: if a wall is opened and something inside it is moved or replaced, you’re in permit territory.
Homeowners sometimes ask whether the permit is worth the hassle. The honest answer is that a permit is the only independent verification that the work was done to code. Two things happen during a permitted bathroom remodel. A plumbing inspection verifies that supply lines are pressure-tested and drains are slope-correct before the wall closes. An electrical inspection verifies that the GFCI protection and the exhaust fan are installed correctly, which matters in a wet room. A final inspection verifies it all before the last coat of paint.
What that means for you in practical terms:
- When you resell a Spring Valley home, a permitted remodel is documented and insurable. An unpermitted one is a negotiating discount, often a large one.
- If a leak from an unpermitted shower pan damages the home below, the insurance claim is a much harder conversation.
- If you ever need a warranty claim on a plumbing or electrical defect, the permit record is the evidence.
The right question to ask every contractor is simple: will you pull the permit, and will you schedule the inspections? If the answer is anything other than yes, that’s a contractor who is shifting risk onto you. We pull permits and pass inspections on every project that requires one, and we put the permit number on the estimate.
What a Remodel Should Look Like, Step by Step
A bathroom remodel that finishes on budget follows a predictable sequence. Here’s what the process should look like from a Spring Valley homeowner’s seat.
- Free estimate and design consult. An in-home visit to measure the bathroom, inspect the visible systems, and walk the tier options with real numbers. You leave with a written scope and a line-item range, not a single grand total. This is where the investigation we described earlier should happen.
- Pre-demo inspection. Opening the wall to inspect is a legitimate step before final pricing. Any contractor who won’t allow it is a contractor asking you to accept risk you can’t see.
- Permit application and approval. Filed before demo, so the timeline is anchored to a real review date rather than an optimistic guess.
- Demo and rough-in. Tile removed, plumbing and electrical exposed. This is where findings are documented, shown to you, and turned into written change orders with pricing attached.
- Inspections. Plumbing and electrical inspected before the wall closes. This is the step that separates a remodel from a repair.
- Waterproofing and substrate. A bonded membrane in the shower, a properly sloped pan, and a moisture-resistant backer board. This stage is invisible in the finished product and is the stage most likely to fail in ten years if it isn’t done right.
- Tile, finishes, and fixtures. The visible layer. The part everyone thinks about, and the part that only looks good when everything underneath was done correctly.
- Final inspection and walkthrough. Every fixture tested, every GFCI verified, the fan confirmed to vent outdoors, and the whole job signed off in writing.
Most Spring Valley bathroom remodels at Tier 1 finish in a few days. Tier 2 runs two to three weeks depending on tile cure times and inspection scheduling. Tier 3 runs five to eight weeks, longer if layout changes force a drain relocation. Those are the real numbers, and any bid that promises significantly faster is either skipping steps or skipping the permit.
Common Mistakes to Avoid
- Accepting a single lump-sum bid. A bathroom bid without line items is a bid that hides the biggest costs. Ask for plumbing, electrical, waterproofing, tile, fixtures, and permit listed separately. If the contractor can’t break it down, they haven’t scoped it.
- Skipping the pre-demo inspection. In a Spring Valley home from the 1980s or 1990s, opening the wall for inspection before pricing is not a luxury. It’s the cheapest insurance you can buy against a mid-project budget surprise.
- Choosing an exhaust fan by price. The fan is the cheapest component in the bathroom and the one with the longest-running consequences. Get a unit rated for the room’s volume, and confirm the duct terminates outdoors with insulated flex.
- Choosing a tile that fights hard water. Polished marble in a Spring Valley shower will etch and stain. Matte porcelain won’t. Choose the finish for the water you actually have.
- Assuming the shower pan is fine because the tile looks fine. The pan is the most common hidden failure in homes from this era. It’s also the most expensive to ignore. A $300 inspection today is a $6,000 repair avoided in three years.
- Letting the contractor self-permit and skip inspections. Inspections are the independent verification that the plumbing and electrical were done correctly. Ask for the permit number and the inspection dates in writing.
- Skipping the moisture check on adjacent rooms. A leak that’s been running behind a shower wall can have traveled into the next room’s drywall or the hallway ceiling. Inspect the surrounding walls, not just the bathroom.
See the difference
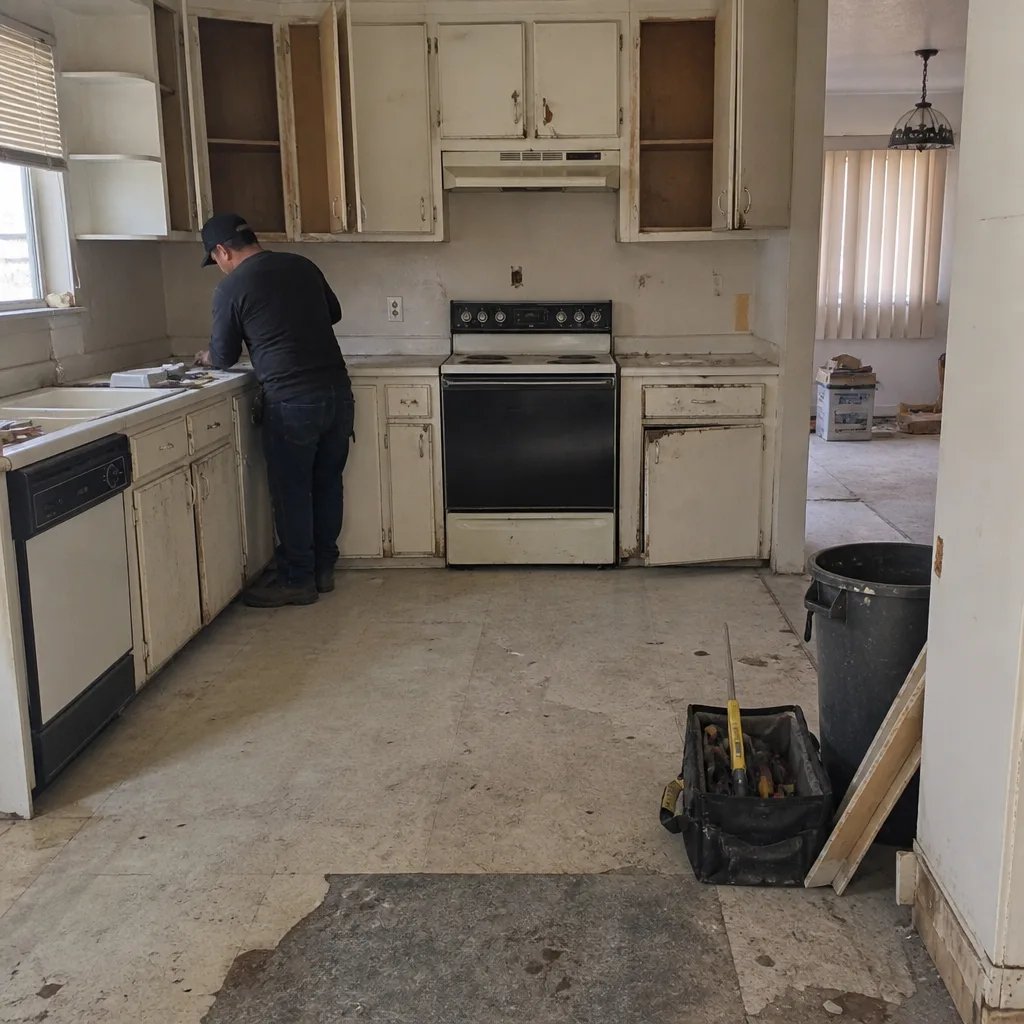 Before
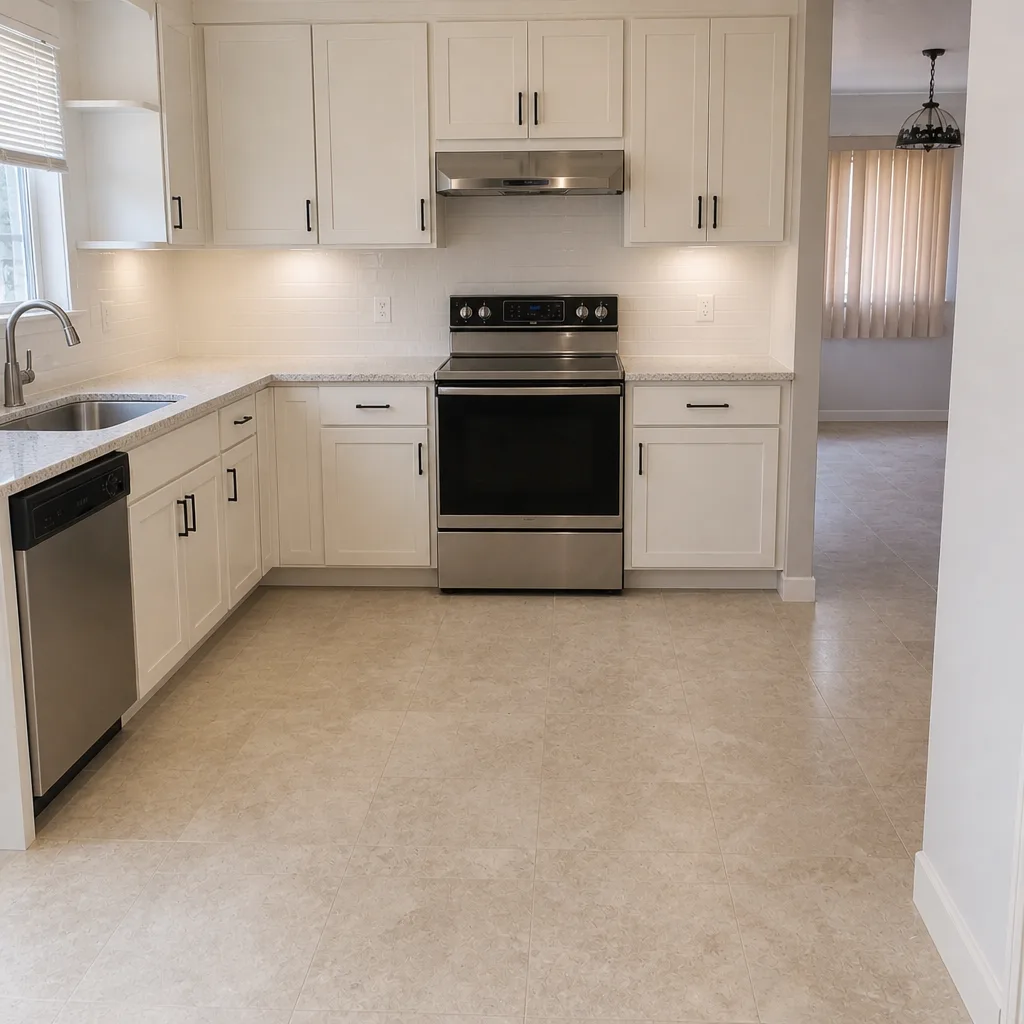 After
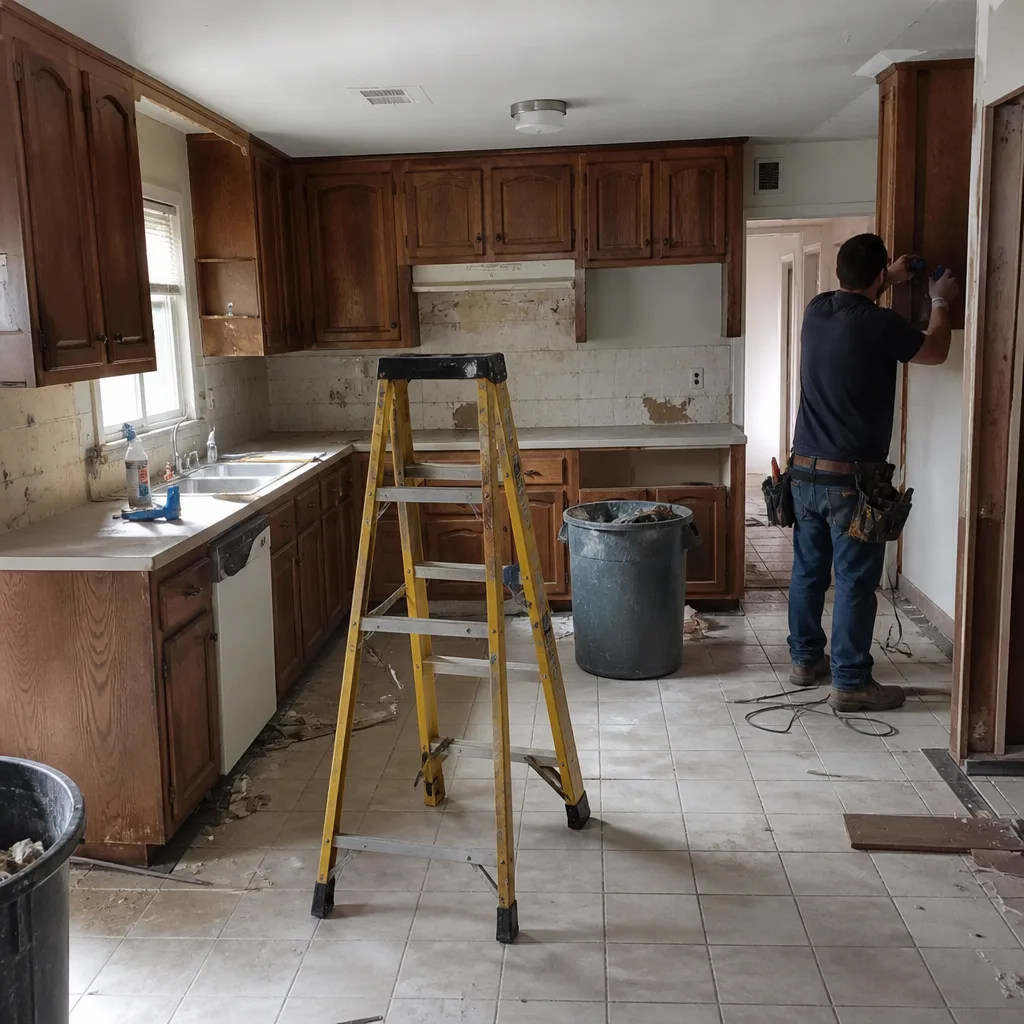 Before
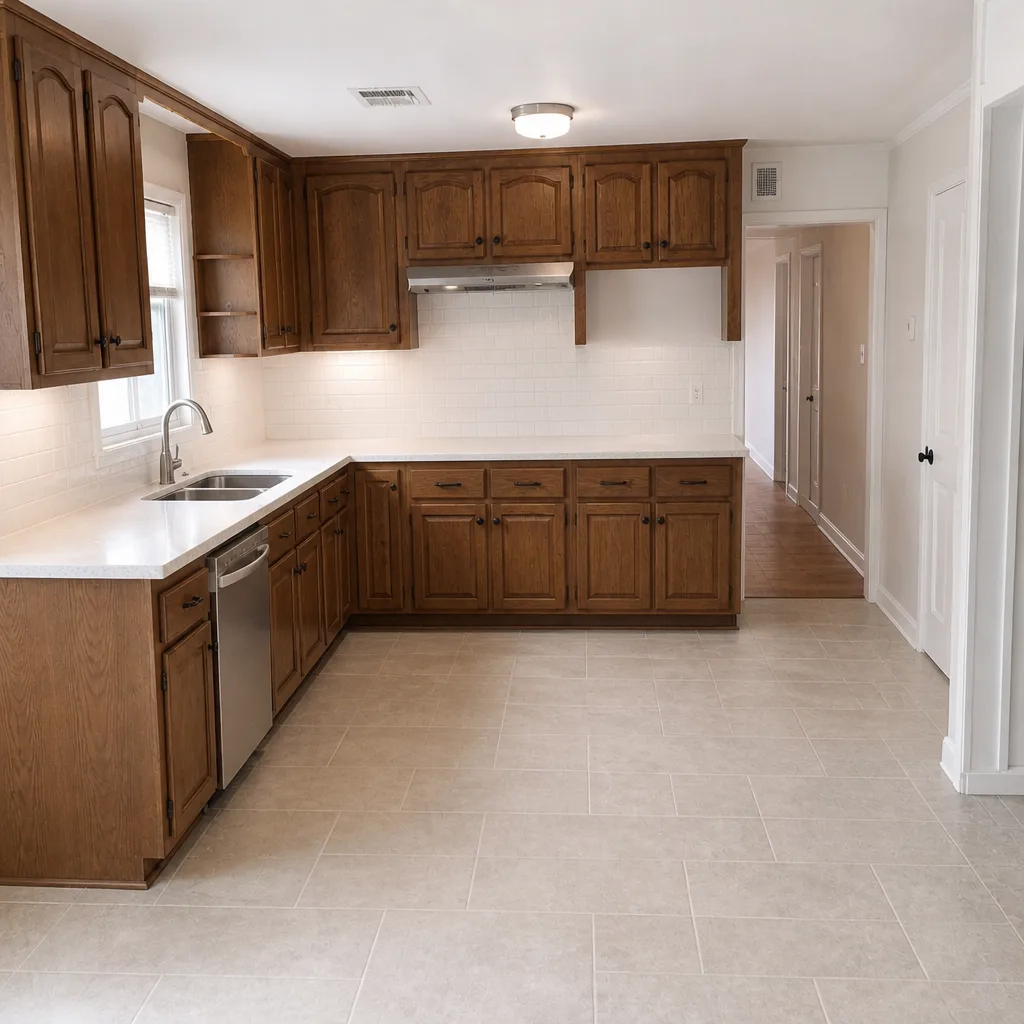 After
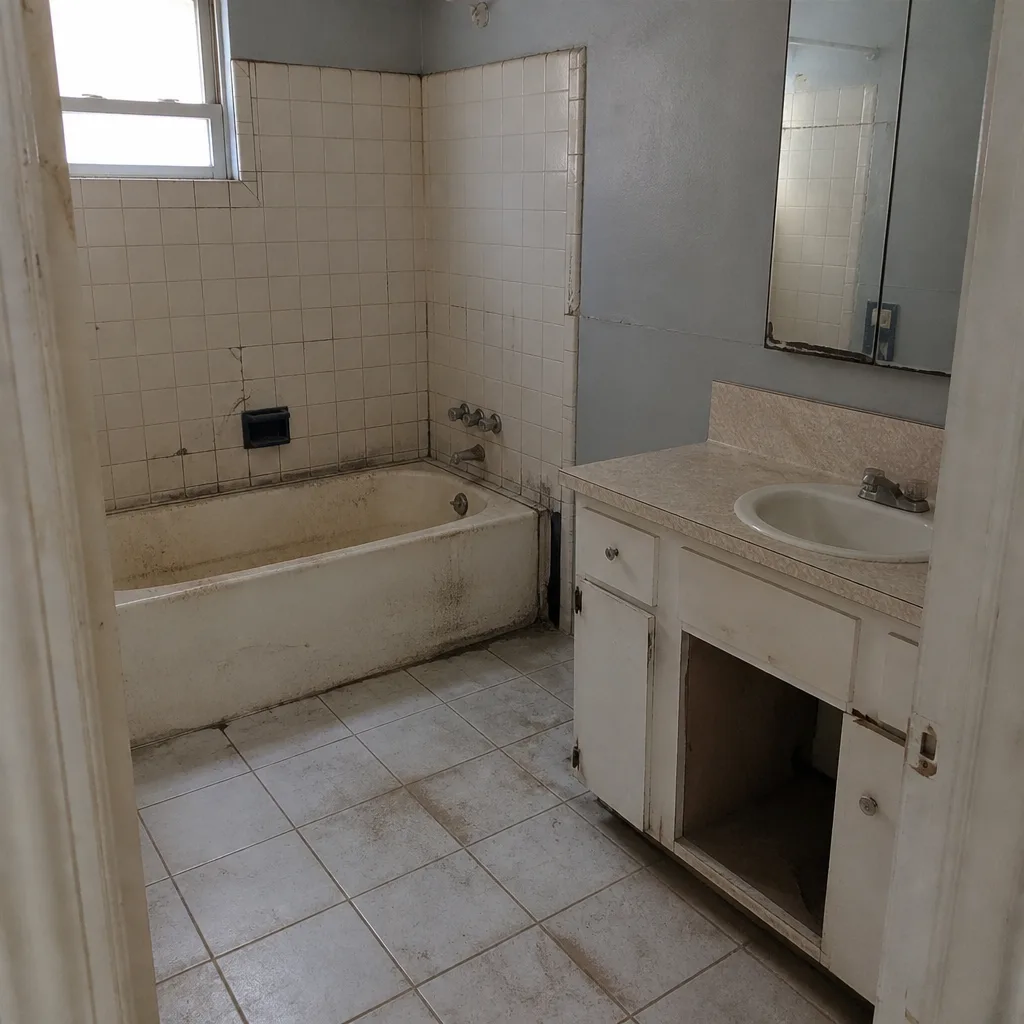 Before
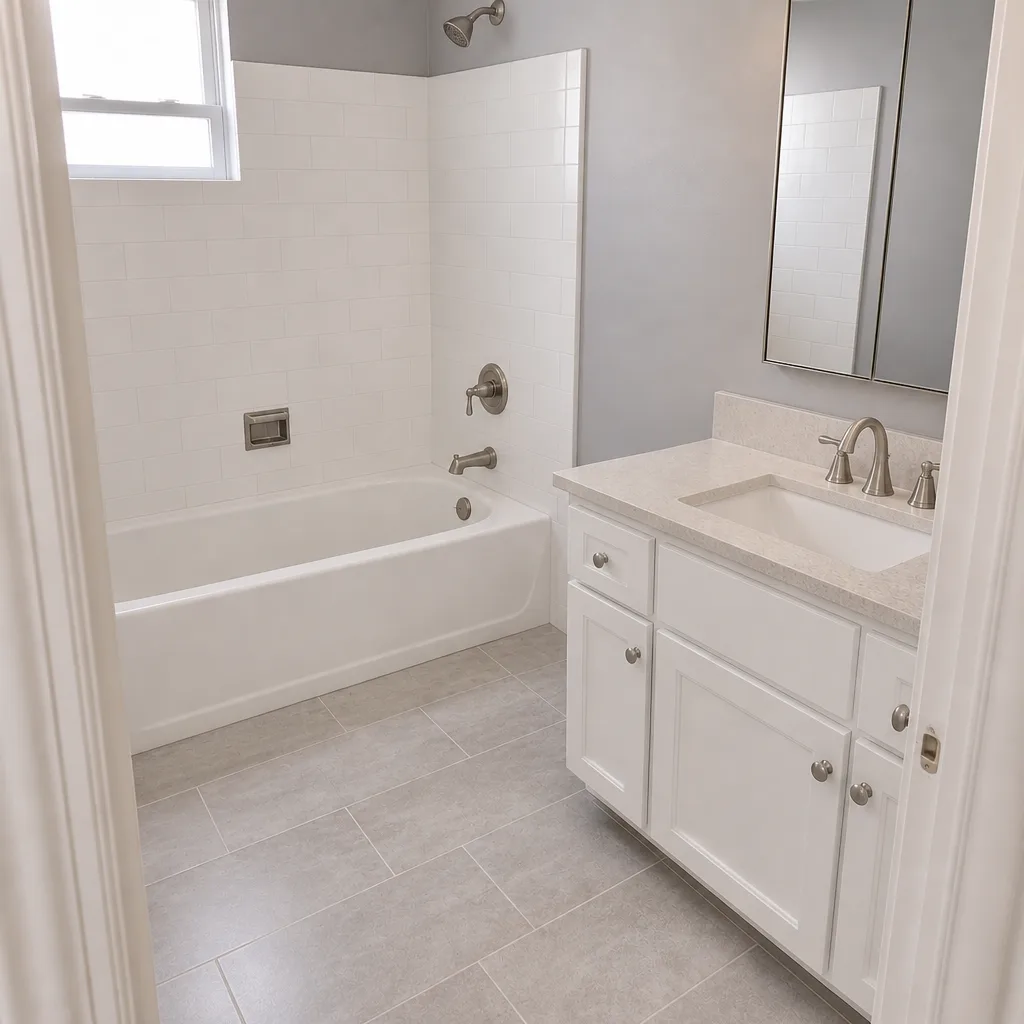 After
When to Call a Professional
Some of this is DIY-adjacent. Painting, swapping a vanity, replacing a faucet with a shutoff you can close without a wrench – all reasonable. But the list of things that shouldn’t be DIY in a bathroom is longer than the list of things that should, and it’s where safety and liability live. High-voltage work in a wet room is the first: GFCI circuits, dedicated bathroom circuits, and any panel work should be handled by a licensed electrician. Gas, if there’s a gas water heater involved, is the second. Plumbing that involves opening a wall and re-soldering or re-piping is the third, especially in a Spring Valley home where the supply lines may be galvanized or polybutylene and one wrong move turns a faucet swap into a whole-bath repipe.
The bigger signal is a shower pan that gives or a subfloor that flexes. Those aren’t DIY. And if you’re planning a full gut-and-rebuild with a layout change, you’re into a scope that requires permits, inspections, and a paper trail – which is professional territory regardless. Groundwork Construction Co. of Spring Valley offers free estimates in Spring Valley – call (888) 329-9414. We’ll inspect the bathroom before anyone quotes you, show you what we find, and write the scope in plain language.
Frequently Asked Questions
A bathroom remodel in Spring Valley typically runs $9,000-$16,000 for a cosmetic refresh, $18,000-$35,000 for a mid-scope replacement, and $40,000-$75,000 for a full gut-and-rebuild with layout changes. The range is wide because the cost is driven by what’s behind the walls, not by the finishes you pick. Call (888) 329-9414 for an exact quote – estimates are free.
It can, and any honest contractor will tell you so – but the size of the change depends on how well the job was scoped. A written bid that includes a stated allowance for unforeseen substrate repair and a change-order process protects you from a blank-check surprise. A lump-sum bid with no allowance is a bid that assumes the walls are clean and will renegotiate the moment demo says otherwise. Call (888) 329-9414 for a written, line-item scope before you commit to anything.
Yes. Any bathroom project touching plumbing, electrical, or framing requires a permit in Clark County, and we pull it before demo starts. Inspections happen at rough-in and at final, and the permit number goes on the estimate. A contractor who won’t pull the permit is shifting that risk onto you. Call (888) 329-9414 and we’ll walk through what a permitted scope looks like for your bathroom.
A cosmetic refresh in Spring Valley typically finishes in a few days and often completes in a single visit. A mid-scope replacement runs two to three weeks including cure time and inspection scheduling. A full gut-and-rebuild runs five to eight weeks, longer if a layout change forces a drain relocation. Call (888) 329-9414 for a timeline specific to your bathroom.
Build era matters because the materials and code requirements of that period are now at the end of their service life. Galvanized and polybutylene supply lines, cast iron drains with scale, lead or hot-mopped shower pans, and undersized builder-grade exhaust fans are all common in that stock. None of those are visible at the planning stage, which is why a pre-demo inspection is worth doing before you accept a bid. Call (888) 329-9414 to schedule one.
Hard water itself isn’t a damage repair – it’s a maintenance reality. Descale the fixtures, choose porcelain tile over polished stone, use epoxy grout in the shower, and expect annual sealing on any natural stone. What hard water does cause over time is scale on shower heads, etching on stone, and staining on grout, all of which a material choice up front can reduce. Call (888) 329-9414 and we’ll walk through which finishes make sense for the way your bathroom actually gets used.
The Bottom Line
Bathroom remodeling in Spring Valley rewards the homeowner who investigates before they price. The three hidden variables – outdated plumbing, failed waterproofing, and improper exhaust ventilation – drive nearly every budget overrun in this market, and every one of them has a visible tell before anyone opens a wall. Scope your project in the right tier, insist on a line-item bid with a stated allowance for unforeseen conditions, choose materials that can handle the water and the heat, and pull the permit. Then hire a contractor who will put the workmanship in writing, show up in uniform, and answer the phone when you call. That’s the whole framework. The rest is finishes.
Ready to price your Spring Valley bathroom? Call (888) 329-9414 to schedule a free estimate and design consult. Our technicians have up to 12 years of experience, they arrive background-checked and in uniform, and every project is covered by our 730-Day Done Right Promise – if it’s not done right, we make it right. We’ll inspect before we quote, show you what we find in writing, and give you upfront pricing with no surprises. Every project over $10,000 includes $1,000 off, and 0% financing is available for 18 months.
Written by the team at Groundwork Construction Co. of Spring Valley.