Last updated November 17, 2026

Free written scope consultation - allowances, timeline, and change-order rules on paper before a single trade is scheduled
Driveway & Pavers Maintenance Checklist for Spring Valley Homeowners
A paver sealer that holds up for three years in Oregon often fails in fourteen months in Spring Valley. That’s not a sales pitch for premium products. It’s what we see on driveways across the valley every spring, and it surprises homeowners who followed the maintenance advice printed on the back of a jug bought at a national hardware chain. The Mojave doesn’t follow national maintenance calendars. UV index, alkaline soil, and mineral-heavy water all work on your pavers at once, and they work faster here than almost anywhere else in the country. This guide is the checklist we’d hand a neighbor: what to inspect, when to re-sand, what actually removes efflorescence, and the crack patterns that tell you the ground under your driveway is moving before the surface gives out.
Quick Answer
Spring Valley pavers need re-sealing every 12 to 18 months, not every 3 to 5 years, and polymeric sand joints typically need refreshing twice a year – once after winter and once after monsoon season. Use a breathable, UV-stabilized sealer rated for high-solar climates, clean with a pH-neutral detergent rather than muriatic acid or bleach, and inspect for stair-step cracking along the edges each spring. Those four habits prevent most of the premature repairs we see on Spring Valley driveways.
Styles & brands we work with
- Kitchen remodeling
- Bathroom remodeling
- Home additions & ADU
- Roofing
- Windows & doors
- Driveway & pavers
- Fence
Table of Contents
- Why Paver Sealers Fail Faster in Spring Valley
- Hard Water, Efflorescence, and What Actually Removes It
- Caliche Heave: Reading Crack Patterns Before Failure
- The Seasonal Re-Sanding Schedule for Polymeric Joints
- Cleaning Products That Chemically Damage Pavers
- The Spring Valley Spring Maintenance Checklist
- Monsoon Prep and Post-Storm Inspection
- When to Repair, Re-Seal, or Replace
Why Paver Sealers Fail Faster in Spring Valley
Spring Valley sits at roughly 2,200 feet with a solar index that regularly hits 11 or higher from May through September. That’s “extreme” on the UV scale, the top of the chart, and it breaks down the polymer chains in solvent-based and water-based acrylic sealers far faster than the temperate climates most manufacturer data sheets are tested in. A film-forming acrylic that lasts 36 months in Portland or Seattle is often showing chalky haze, color fade, and surface crazing at 12 to 15 months in Spring Valley. It hasn’t been installed wrong. It’s been cooked.
What actually holds up here falls into a few categories:
- Penetrating siloxane or silane sealers: these soak into the paver rather than sitting on top, so they don’t chalk or peel. Expect 18 to 24 months of service in Spring Valley before reapplication.
- Urethane-based sealers: better UV stability than acrylic, but they can darken pavers and trap moisture if applied on a damp slab. 2 to 3 years is realistic in this climate.
- Acrylic film-formers: the cheapest and most common, and the shortest-lived here. Plan on 12 to 18 months and expect to strip them before re-coating.
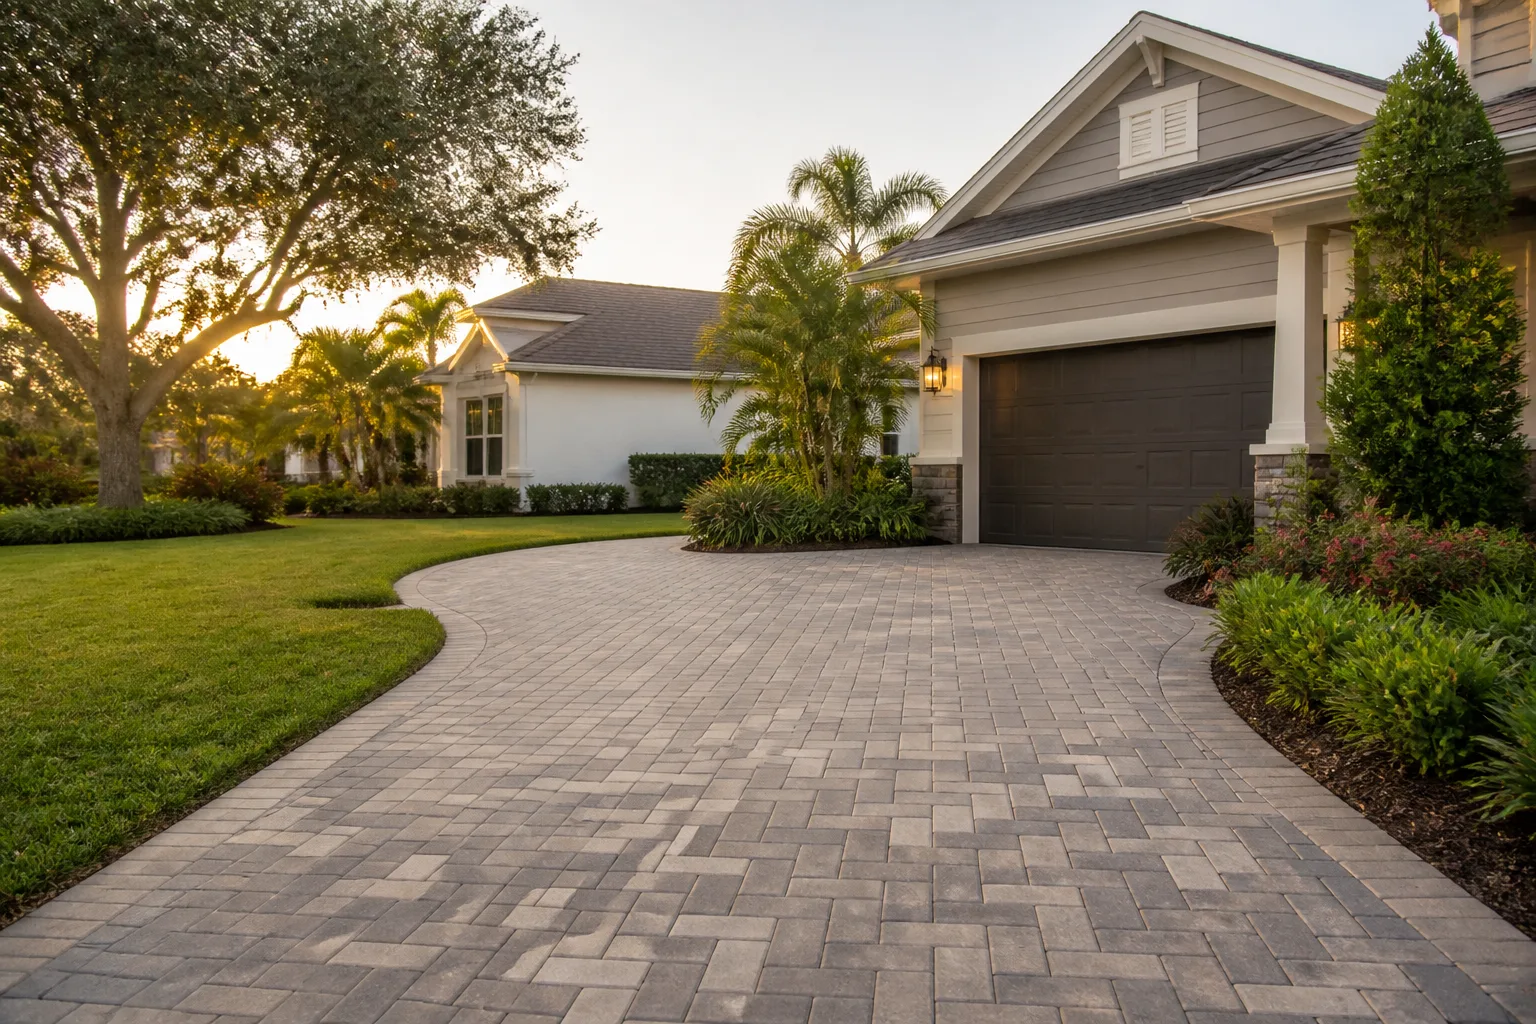
The other thing manufacturers don’t tell you: the standard advice to seal a new driveway “immediately” is wrong for Spring Valley. In this heat, a fresh paver installation should cure 60 to 90 days before the first sealer coat. Sealing too early traps construction moisture and drives efflorescence to the surface. We’ve watched more than one homeowner in the Rhodes Ranch and Southern Highlands area seal a brand-new driveway in week two, then spend a month scrubbing white haze off it. If you’re planning a full replacement instead of maintenance, our Driveway & Pavers in Spring Valley page walks through materials, base prep, and what a properly cured install looks like.
Hard Water, Efflorescence, and What Actually Removes It
Las Vegas Valley Water District supply runs hard – typically in the 250 to 350 mg/L range for total hardness, with calcium carbonate as the primary mineral. When that water sits on a paver face, evaporates, and re-wets daily from irrigation overspray or a poorly aimed sprinkler, the calcium and magnesium it carries stay behind. Combine that with the natural calcium salts already present in the concrete base and the paver itself, and you get efflorescence: the milky white bloom that shows up on Spring Valley pavers most often in spring, when groundwater rises after winter and pulls salts toward the surface.
Here’s the part most online advice gets wrong. Efflorescence isn’t dirt, and scrubbing harder won’t fix it. It’s a salt deposit driven by moisture moving through the paver. You have three moves:
- Stop the water source first. Retarget sprinkler heads away from the driveway edge, fix the drip line, or add a slight grade adjustment at the paver-to-landscape transition. If water keeps entering, the bloom keeps coming back.
- Dry-brush and rinse. Most light efflorescence comes off with a stiff nylon broom and low-pressure water. No chemicals.
- Use a purpose-made efflorescence remover. Diluted according to label, applied to a wet surface, dwelled for the specified minutes, then scrubbed and flooded off. Do not use muriatic acid on pavers unless the manufacturer explicitly approves it for that specific product.
If you’ve got heavy salt bloom that comes back within weeks, that’s a moisture problem, not a cleaning problem. It usually means the base wasn’t compacted correctly or the drainage falls toward the house. A free estimate from a qualified installer can identify which one you’re dealing with. If your driveway is also nearing the end of its life, this is the point when a paver replacement or re-base costs less than another round of patching.
Caliche Heave: Reading Crack Patterns Before Failure
Caliche is calcium carbonate cemented into a hard, natural layer beneath much of the Las Vegas Valley, including large parts of Spring Valley. When moisture from irrigation or a leak reaches that layer, the caliche can swell, and when it dries out it contracts. Either direction, it moves the ground under your driveway. Most homeowners find out about it three or four years in, when a paver cracks and they blame the paver.
The crack patterns are the tell. Your pavers tell you what’s happening underneath long before surface failure:
- Stair-step cracks along the edge of the driveway: usually a sign the edge restraint has lost bearing and the field is sliding out. Repair the restraint before it cascades.
- Linear cracks running parallel to the driveway axis: often a base issue – compaction failure or a seam in the subgrade.
- Localized tenting or “tenting” joints: pavers pushed up at a joint. This is caliche heave or root intrusion, and it does not fix itself.
- Long cracks spreading from the corner of the garage slab: typical of differential movement between the foundation-slab and the driveway base.
- Random diagonal cracks across many pavers in one area: usually base failure under that zone, not a paver defect.
What you do about it depends on which pattern you’ve got. Hairline cracks in an isolated area can often be lifted, re-based, and re-set as a spot repair. A full field of movement means the base failed and no amount of sealer will fix it. In our experience across Spring Valley, caliche-related issues are one of the top three reasons a “maintenance” job turns into a rebuild – and they’re almost always cheaper to fix the spring you notice them than the summer the driveway loses a section.
The Seasonal Re-Sanding Schedule for Polymeric Joints
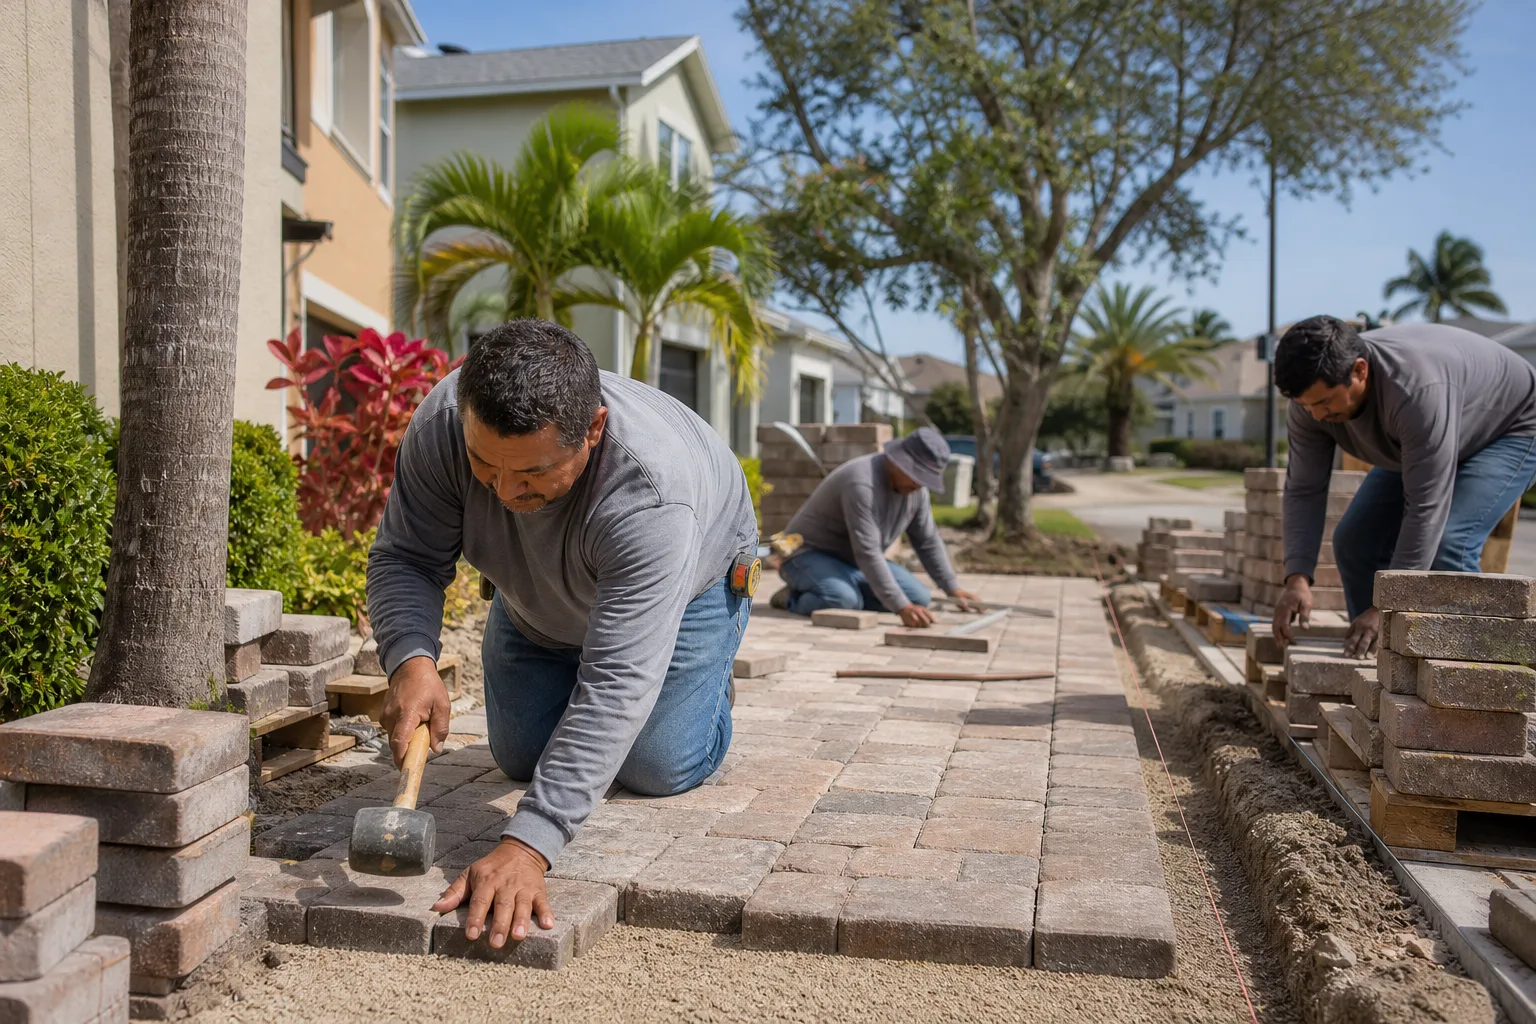
Polymeric sand is the sand that hardens in the joints between pavers and keeps the whole field locked together. In most of the country, it’s a “top off every 3 to 5 years” item. In Spring Valley, wind and monsoon season work the joints twice a year, so the practical schedule is: re-sand in early spring, spot-fill again after the first heavy monsoon rain in late summer. That’s not overkill. That’s what the climate demands.
Why the Spring Valley schedule differs:
- Spring wind events. March through May brings regular gusts of 30 to 40 MPH through the valley. Those gusts erode uncapped joint sand, especially on driveways that face an open lot or the desert edge.
- Monsoon runoff. July through September thunderstorms drop the entire month’s rain in an hour. If the joints are low, that water shears the poly-sand loose.
- Thermal cycling. Daily swings that might be 15 degrees in a cooler climate can run 35 to 40 degrees here. The paver joints open and close constantly, and depleted sand accelerates that.
The correct re-sand process:
- Wait for a dry week – at least 48 hours with no rain and no irrigation on the driveway.
- Blow out and brush the joints so they’re clean and open to at least two-thirds their depth.
- Fill with fresh polymeric sand rated for the joint width (Quikrete and Sakrete both make quality options labeled for wide joints).
- Sweep in at a 45-degree angle, compact with a plate compactor fitted with a rubber pad, and repeat if the joints settle.
- Mist gently, per the manufacturer’s activation instructions, and stay off the driveway for the specified cure time.
If you’re refreshing fences, gates, or outdoor structures at the same time, this is also a good season for it – see our Fence Installation in Spring Valley guide for timing that pairs well with driveway work.
Cleaning Products That Chemically Damage Pavers
This is where we see the most self-inflicted damage. Search “how to clean pavers” and you’ll find recommendations that will dull, etch, or strip pavers in a high-heat climate. Spring Valley’s heat accelerates every chemical reaction, so a product that’s “mild” at 65 degrees in Ohio can be aggressive at 105 degrees on a July afternoon.
Products to avoid:
- Muriatic acid (undiluted or even “standard dilution”): etches the paver face and dissolves the cementitious binder in the base. It also strips most sealers and voids many manufacturers’ warranties when not applied per spec.
- Chlorine bleach: kills organic growth, but it also bleaches paver color, especially on stamped or integrally colored concrete pavers, and it damages polymeric sand.
- Concentrated TSP (trisodium phosphate): recommended online for heavy stains, but it leaves a residue that attracts and binds new dirt, and it can streak on hot surfaces.
- Acetone, lacquer thinner, and unknown “sealer removers”: fine if the specific sealer’s data sheet calls for it. Otherwise, they damage the paver face permanently.
- Pressure washing above 2,500 PSI: not a chemical, but the bigger hazard. It drives water into the base, blows out joint sand, and can fracture older pavers. Stay at 1,500 to 2,000 PSI with a wide fan tip.
What actually works: a pH-neutral paver cleaner, diluted per label, applied on a cool surface (early morning is best in Spring Valley), scrubbed with a stiff-bristle broom, and rinsed with low-pressure water. Two passes at moderate strength beat one pass at full strength.
The Spring Valley Spring Maintenance Checklist
Here’s the sequence we’d run on any Spring Valley driveway in March or April, before the heat hits and after winter moisture has done its worst:
- Walk the field and note every crack, rocker, and settled zone. Mark them with chalk or landscape paint so you don’t lose track once you start cleaning.
- Check the edge restraint the whole way around. If the concrete or plastic edge has pulled away, the field is going to spread.
- Probe for efflorescence and salt bloom, especially near sprinkler heads and downslope from any planting beds.
- Check joint sand depth with a screwdriver or pocketknife. If the sand is more than a quarter inch below the paver face in more than a few joints, re-sand the whole field.
- Look for caliche heave patterns, especially tenting at joints and linear cracks parallel to the driveway. Photograph anything you’re unsure about.
- Clean with pH-neutral detergent on a cool surface, rinse low-pressure, and let dry 48 hours.
- Re-sand where needed per the polymeric schedule above.
- Re-seal only if the surface is fully dry and the last sealer is at the end of its window. Don’t seal over chalky or flaking sealer – it will peel.
If your driveway was installed within the last two years and never sealed, don’t seal it now unless your installer confirms it’s cured. If it was installed more than two years ago and sealer is due, spring is the right window: temperatures here are in the 70s and low 80s, low enough for good cure, high enough for proper penetration.
Monsoon Prep and Post-Storm Inspection
Monsoon season in the valley runs July through September, and Spring Valley gets its share – typically a handful of events that drop an inch or more in a short span and produce sheet flow across driveways. Prep work in June prevents most of the damage. Post-storm inspection in July and August catches the rest.
Pre-monsoon prep (June):
- Re-sand any joints below the paver face.
- Clear the drainage path at the bottom of the driveway so water doesn’t pond against the garage slab.
- Verify your edge restraint is still anchored.
- Trim back any landscape that’s overhanging pavers and dropping debris into joints.
Post-storm inspection (within 48 hours of any event):
- Walk the field looking for newly displaced pavers, especially at the driveway apron.
- Check for joint sand loss along the sides where water runs fastest.
- Look for ponding zones – standing water more than 24 hours after a storm signals a grade or drainage problem that needs a real fix, not a re-sand.
- Photograph anything you find so you can track whether it’s worsening over the season.
If you’re also planning outdoor structures, covered patio, or an attached ADU, the driveway grade ties into your site drainage plan – our Home Additions & ADU in Spring Valley team coordinates those details when a driveway is part of a larger site project.
When to Repair, Re-Seal, or Replace
Most homeowners ask us this question at the wrong moment – after failure, when the choice is expensive. The better question: which of these three situations am I actually in?
- Re-seal: surface is intact, no lifted pavers, joints sound, sealer is due. Cost is minimal and the work is routine.
- Repair: isolated lifted pavers, edge restraint failure, or a spot of settled base. Lift, re-base, re-set, re-sand. Most Spring Valley repairs fit within a single visit.
- Replace: widespread caliche heave, base failure across the field, or pavers that have been sealed over failed sealer to the point where stripping is more expensive than re-laying. This is when the driveway has stopped being a maintenance item and become a construction project.
Rule of thumb we use on Spring Valley driveways: if more than 20 to 25 percent of the field has visible movement, replacement with proper base prep is more economical than another round of repairs. Below that threshold, targeted repair and re-seal almost always wins. We walk every prospective customer through which situation they’re in, with an upfront written quote, before any work begins.
Common Mistakes to Avoid
- Following national sealer schedules. “Re-seal every 3 to 5 years” is fine in Oregon. In Spring Valley, that schedule guarantees a failed sealer coat peeling off your driveway. Use 12 to 18 months as the working window.
- Sealing a brand-new driveway in week two. Fresh pavers need 60 to 90 days of cure in this climate before the first coat. Sealing early traps moisture and drives efflorescence.
- Using muriatic acid for efflorescence. The most-recommended fix online is also the fastest way to void a manufacturer warranty and dull the paver face. Use a purpose-made remover.
- Pressure washing at 3,000+ PSI. It feels effective and it destroys the joint sand and drives water under the base. Cap it at 2,000 PSI with a wide fan tip.
- Ignoring edge restraint failure. A short section of pulled-away concrete edge lets the field spread joint by joint. Repair it in week one, not after the third paver lifts.
- Skipping the post-monsoon re-sand. Waiting until spring to fill monsoon-eroded joints means the entire fall and winter passes with an under-sanded field, and cracks show up in January.
- Treating caliche cracks as a paver defect. Stair-step, linear, and tenting cracks are subsurface signals. If you patch the pavers without addressing the base, you’ll re-do the same repair next season.
See the difference
 Before
 After
 Before
 After
 Before
 After
When to Call a Professional
Some of this checklist belongs in your hands: sweeping, spot cleaning, and seasonal inspection. Other parts are worth a professional look. Call us if you’re seeing more than one section of tenting or lifted pavers, if efflorescence returns within six to eight weeks of a proper removal, if the edge restraint has pulled away from the field, or if a crack in one area has spread to a dozen pavers in the same zone. All of those point to subsurface movement – caliche heave or base failure – and re-sanding or re-sealing won’t fix them.
Groundwork Construction Co. of Spring Valley offers free estimates in Spring Valley – call (888) 329-9414 and we’ll walk your driveway with you, show you what we’re seeing, and give you an upfront written quote before any work starts. Calls are answered by a live person, 24/7.
Frequently Asked Questions
Every 12 to 18 months for most sealers, not the 3 to 5 years listed on national data sheets. UV intensity at this elevation breaks down film-forming sealers roughly twice as fast as in cooler climates, and penetrating siloxane sealers last 18 to 24 months here before they need refreshment. Call (888) 329-9414 if you’d like a professional look at whether your current sealer is due.
It’s efflorescence – calcium salts drawn to the surface by moisture in the base. Fix the water source first (retarget sprinklers, check grade), then use a purpose-made efflorescence remover rather than muriatic acid. Heavy bloom that returns in weeks usually means a base or drainage issue, not a cleaning issue. Call us for a free estimate if it keeps coming back.
Look for stair-step cracks along the edge, linear cracks parallel to the driveway, tenting at joints, and long cracks spreading from the garage slab corner. Those patterns point to subsurface movement rather than paver wear. If you’re seeing more than one of them, stop re-sanding and get a professional inspection. Call (888) 329-9414.
Yes, but keep the pressure between 1,500 and 2,000 PSI with a wide fan tip, work on a cool surface, and use a pH-neutral cleaner rather than bleach or TSP. Anything above 2,500 PSI will blow out joint sand and drive water under the base. If your driveway is more than 10 years old or has an older sealer coat, professional cleaning costs less than a re-sand and re-seal job.
March through May, with a second pass in September after monsoon season. Spring temperatures are ideal for sealing and re-sanding, and post-monsoon inspection catches storm damage before winter. Avoid sealing after mid-June; heat above 90 degrees during application prevents proper cure. Call (888) 329-9414 to schedule a spring maintenance visit.
Both. If your field is above 20 to 25 percent movement, we’ll tell you replacement with proper base prep is the more economical path. Below that, targeted repair plus re-seal is almost always the right call. We give you the answer based on what your driveway actually needs, with a written upfront quote. 0% financing for 18 months is available on qualifying projects, and $1,000 off your project if it’s over $10,000.
The Bottom Line
Spring Valley pavers don’t fail because of bad installation. They fail because national maintenance schedules don’t apply here. UV, alkaline soil, and hard water compress the sealer timeline from years to months, push efflorescence to the surface after every monsoon, and drive caliche movement that shows up in specific crack patterns before the surface lets go. Match your calendar to the Mojave, not to a data sheet written for Oregon: re-seal every 12 to 18 months, re-sand twice a year, clean with pH-neutral products, inspect for caliche cracks every spring, and skip the muriatic acid and high-pressure washing. Do that and your paver driveway holds its color, its joints, and its structure for the full service life the manufacturer designed it for – and then some.
For a free estimate on any driveway or paver project in Spring Valley, call Groundwork Construction Co. of Spring Valley at (888) 329-9414. We answer live, 24/7, and every project is backed by our 730-Day Done Right Promise.
Explore what we build across the valley through Groundwork Construction Co. of Spring Valley home.
Written by the team at Groundwork Construction Co. of Spring Valley.