
Last updated November 17, 2026








Free written scope consultation - allowances, timeline, and change-order rules on paper before a single trade is scheduled
Bathroom Remodeling Maintenance Schedule: What to Do and When
Most bathroom remodels show their first signs of failure not from poor workmanship, but from missed 90-day maintenance windows the homeowner never knew they had. We’ve walked into Spring Valley bathrooms five years after a remodel and found the same story: beautiful tile, solid framing, and a caulk line that quietly gave up two winters ago. The grout looks fine from standing height. The exhaust fan still hums. Nothing screams for attention until the ceiling below starts to stain.
This guide lays out a practical maintenance schedule by material type and by month, not just by season. You’ll learn why grout and caulk should never be treated on the same timeline, how to read your exhaust fan’s decline before it affects your tile, which surfaces need sealing and which don’t, and exactly what to check at the 730-day mark. Spring Valley’s dry air and hard water make some of these steps more urgent than the generic advice you’ll find online.
Quick Answer
A bathroom remodel should be maintained on a rolling schedule: inspect and touch up caulk every 6 to 12 months, reseal natural stone every 12 months and porcelain or ceramic every 3 to 5 years, deep-clean grout twice a year, clean the exhaust fan every 6 months and replace it every 8 to 10 years, and re-check every fixture seal and drain connection at the 730-day mark. The single most important habit is inspecting silicone joints around tubs, showers, and sinks at the 6-month point, before a small gap becomes a hidden leak.
Styles & brands we work with
- Kitchen remodeling
- Bathroom remodeling
- Home additions & ADU
- Roofing
- Windows & doors
- Driveway & pavers
- Fence
Table of Contents
- Why a Remodel Starts a Maintenance Clock
- Grout and Caulk Are on Different Clocks
- Sealing Intervals by Surface: Stone, Porcelain, and Ceramic
- The 6-Month Silicone Joint Inspection
- Your Exhaust Fan Degrades on a Schedule
- A Year-Round Schedule for Spring Valley Homes
- The 730-Day Post-Remodel Checklist
- Hard Water, Dry Air, and Spring Valley Surfaces
Why a Remodel Starts a Maintenance Clock
The day a contractor hands back your bathroom, a clock starts. Not a metaphorical one. Every material in that room has a known service life for its protective coatings, and those lives are shorter than homeowners assume. Silicone caulk around a shower pan has a realistic lifespan of 5 to 10 years in a well-ventilated bathroom and 3 to 5 years in a room that stays humid. Cementitious grout on a shower wall can last decades if it’s sealed and cleaned correctly, and about half that if it isn’t.
In our experience across Spring Valley, the failures we get called back to inspect are almost never structural. They’re maintenance. A homeowner who resealed at year two and re-caulked at year four has a bathroom that still looks new at year ten. A homeowner who did neither has a bathroom that needs a $4,000 to $9,000 partial rebuild because water found the framing behind the tile.
Here’s the practical version of the maintenance clock for a typical Spring Valley bathroom remodel:
- Months 1 to 6: settling and curing. Watch for hairline cracks in new grout, and check that all fixtures are seated.
- Month 6: first silicone joint inspection. This is the one most people skip and the one that matters most.
- Month 12: first full inspection. Reseal stone, deep-clean grout, clean the exhaust fan.
- Years 2 to 4: annual reseal of stone, biannual grout cleaning, and re-caulking of any high-use joints.
- Year 5 to 7: porcelain and ceramic sealing, and a full re-caulk of tub and shower surrounds.
- Year 8 to 10: exhaust fan replacement, and a professional inspection of the shower pan and drain.
Spring Valley’s climate shapes this schedule in ways a national guide won’t tell you. Our summers push indoor humidity swings that expand and contract sealant joints more than a coastal climate does. The dry winter air pulls moisture out of grout faster, which sounds helpful until you realize the cycle of swelling and shrinking is what opens hairline gaps. Builders here plan for that rhythm, and homeowners should too. The full-scope construction approach we take at Groundwork Construction Co. of Spring Valley treats the maintenance handoff as part of the project, not a footnote.
Grout and Caulk Are on Different Clocks
Treating grout and caulk the same is the single most common reason bathrooms fail early. They’re different materials doing different jobs, and their maintenance timelines don’t line up. Grout is rigid. It fills the joints between tiles and resists compression. Caulk is flexible. It seals the corners and transitions where two planes meet, and it has to move with the building. When you reseal both on the same six-month schedule, you either waste money on grout you didn’t need to touch or leave caulk failing for a year longer than it should.
Grout maintenance is mostly about two things: sealing and cleaning. A penetrating grout sealer applied to a shower wall gives you 12 to 24 months of protection. Floor grout in a high-traffic bathroom gets 12 months. Deep cleaning, ideally with a pH-neutral cleaner and a soft brush, keeps the sealer working. Skip the vinegar and bleach routine that circulates online. Vinegar is acidic enough to degrade grout over time, and bleach leaves residue that attracts more dirt.
Caulk is a different rhythm altogether:
- Inspect every 6 months: the tub-to-tile joint, shower corners, the sink backsplash, and the base of the shower door.
- Touch up at first sign of cracking, peeling, or discoloration: that’s the 12-month action for most bathrooms.
- Full removal and replacement every 5 to 7 years: tub surrounds and shower pans take the most abuse and often need it sooner.
- Always use 100% silicone in wet zones: latex caulk fails fast in a shower, no matter how well you install it.
The distinction matters more in Spring Valley than in most markets because of our water. Hard water deposits settle into grout pores and lock in place, which makes that sealer layer work harder. Caulk in a shower that sees three residents and two daily showers will flex more in a year than a guest bathroom will in five. We’ve watched Spring Valley homeowners re-caulk a master shower at year four while the hall bath’s joints were still perfect at year eight. Same house, same products, different usage. The schedule follows the usage, not the calendar.
Sealing Intervals by Surface: Stone, Porcelain, and Ceramic
Every post-remodel guide lumps tile surfaces into one category. That’s a mistake that costs homeowners real money. Natural stone, porcelain, and ceramic have different porosity, different sealer requirements, and wildly different maintenance intervals. Getting this wrong either wastes money on unnecessary sealing or leaves a porous surface open to water and staining.
Here’s how we schedule it by surface type:
- Natural stone (marble, travertine, limestone, slate): seal every 12 months. Marble and travertine in a shower or on a vanity top should be re-sealed to manufacturer spec, usually once a year, sometimes twice if it’s in a shower with daily use. Use an impregnating sealer rated for the specific stone. Never use a topical sealer on a wet surface.
- Porcelain: seal every 3 to 5 years, and only if the tile is unglazed or micro-porous. Glazed porcelain is essentially non-porous and doesn’t need sealing, though the grout lines still do.
- Ceramic: seal every 3 to 5 years at the grout lines. The glazed tile face itself doesn’t need sealer, but cementitious grout does, and treating the grout with the same care as porcelain grout is the right call.
The Spring Valley angle here is water quality. Our hard water leaves mineral deposits that stain and etch natural stone faster than soft water does. A marble vanity in a Spring Valley home that sees daily toothpaste splatter will show etching in two to three years without a reseal, while the same marble south of here in softer water may go five. If a homeowner is going to invest in Cambria quartz or a natural stone, seal it on schedule and wipe it down after use. The two minutes it takes to squeegee a marble shower after each use is easier than paying for re-honing.
We tell homeowners the same thing we tell our own technicians: sealing is cheap insurance. If you’re not sure which surface you have, our team can tell you during a free estimate visit. Learn more about the bathroom remodeling work we handle in Spring Valley.
The 6-Month Silicone Joint Inspection
Six months after the remodel is the most important date on this entire schedule, and almost nobody marks it. Here’s why. Silicone caulk fails from the inside out. The visible surface can look fine while the seal behind it has already broken contact with the tile or the tub. When that gap opens, water travels behind the caulk line and into the substrate, and you won’t see it until it’s wet enough to appear somewhere else, usually the ceiling below or the baseboard behind the wall.
Here’s the 6-month inspection we recommend to every homeowner, and it takes about 15 minutes:
- Press along every caulk joint with a fingertip. Look for soft spots, gaps, or areas where the silicone pulls away from the surface. A properly bonded joint will feel firm and continuous.
- Check the tub-to-tile transition and the shower pan perimeter first. These are the two highest-risk joints in any bathroom.
- Look for any discoloration at the caulk edges. Dark spots, pink or black staining, or a darker line under the caulk means moisture is already inside.
- Check the sink backsplash and the base of the toilet. Less common but easy to overlook.
- Test for soft grout near the corners. If a grout line crumbles when you press it, water has been getting in.
- Look underneath. If you can see the ceiling below the bathroom or access the plumbing, check for any staining at the six-month point.
If anything fails, address it right away. Re-caulking a single joint takes 20 minutes. Repairing water damage behind a shower wall to the tune of $3,000 to $8,000 takes a lot longer. In Spring Valley, we’ve seen showers where the six-month check was skipped and the resulting repair involved replacing the shower pan and two rows of tile. Same story in Spring Valley homes both old and new. The date is the same whether the bathroom was finished last spring or five years ago; if it hasn’t been checked, it’s overdue.
Your Exhaust Fan Degrades on a Schedule
Exhaust fan performance drops measurably as it ages, and most homeowners never notice until the bathroom starts staying foggy after showers. That fog isn’t just annoying. It’s moisture settling into grout, caulk, and the back of the tile. A fan that’s pulling 50% of its rated CFM still sounds like it’s working. The tile doesn’t know the difference until the grout starts to fail.
Fan decline usually follows this pattern:
- Years 1 to 3: minimal degradation. Clean the fan grill every 6 months to keep airflow free.
- Years 3 to 5: 10 to 20% loss in airflow as dust and lint build on the blades and motor housing. A thorough cleaning restores most of it.
- Years 5 to 8: 25 to 40% loss. The fan still runs but takes longer to clear steam. This is the window where a cheap fan starts to lose effectiveness meaningfully.
- Years 8 to 10: replacement is the right answer for most residential fans. A new fan at the same CFM rating runs quieter and moves more air than an old one that’s been declining for a decade.
Here’s the maintenance routine that keeps your fan healthy and your tile dry:
- Every 6 months: remove the fan cover, vacuum the blades and motor housing, and wipe down the grill.
- Every 12 months: check that the damper flap opens and closes freely. A stuck damper is one of the most common causes of ineffective exhaust.
- Every 3 to 5 years: test with a tissue. Hold a tissue up to the running fan. If it doesn’t pull the tissue toward the grill, airflow is compromised.
- Every 8 to 10 years: replace the fan. Size the new one to the bathroom. A 100 CFM fan is right for a 100-square-foot bathroom; a smaller room can use 50 to 80 CFM.
Spring Valley homes often have fans that vent into the attic because of how some older homes were built. If yours is one and you’re not sure, have it checked. A fan venting into an attic doesn’t just fail to exhaust moisture; it deposits it into the attic framing, which is a far bigger problem than a foggy mirror. Tile adhesion fails fastest when the space behind it stays damp, and the exhaust fan is what prevents that.
A Year-Round Schedule for Spring Valley Homes
Running maintenance by season, not just by material, is the second layer to the schedule. Spring Valley has an unusual climate for a desert market: cold winters with dry indoor air, hot summers that stress the HVAC system and the bathroom’s ventilation, and a spring-to-summer transition where humidity swings highest. Here’s how we’d schedule a full year in a Spring Valley home.
Winter (December through February): Dry indoor air pulls moisture out of grout and caulk, which is when hairline cracks show up. This is the right time to inspect caulk joints and grout lines. Clean the exhaust fan and check for frosting or condensation inside windows. Wipe down marble and stone surfaces more frequently; dry air doesn’t protect them from etching.
Spring (March through May): The transition into summer is when Spring Valley sees compressed shower use as the air gets warmer and drier. Reseal stone surfaces now. Deep-clean grout and reapply penetrating sealer. Re-caulk any joint that showed cracking in winter. This is also when we recommend a full 6-month silicone inspection.
Summer (June through August): Indoor humidity runs higher because the AC and shower create a cycle of condensation. Run the exhaust fan 20 minutes after every shower, not 10. Clean the fan grill and check the damper. Inspect the ceiling and walls for any new staining, since summer is when hidden leaks surface visually.
Fall (September through November): This is inspection season. Walk the whole bathroom systematically: caulk joints, grout lines, tile adhesion, drain connections, and any stone surfaces. Do your annual sealing now so surfaces are protected before winter’s dry air. Replace or schedule the fan replacement if it’s in the 8 to 10-year window.
If you’ve just finished a larger project (an addition that includes a bathroom, for example), the schedule starts fresh and stacks with the rest of the home. Our team handles Home Additions & ADU in Spring Valley, and we build the maintenance handoff for bathrooms into the project so homeowners know exactly what to do.
The 730-Day Post-Remodel Checklist
We stand behind our work with a 730-Day Done Right Promise: if it’s not done right, we make it right for two years after the project closes. That window is the longest stretch of protection most homeowners will ever have on a bathroom, and it’s also the period when the most important maintenance actions fall. Here’s what we recommend checking before the 730-day mark closes, whether you’re reviewing our work or anyone else’s.
- Every caulk joint: remove and reinstall, or at minimum inspect and touch up. Tub surrounds, shower corners, sink backsplashes, and the base of the toilet.
- All grout lines: inspect for cracks, especially in the corners and along the floor. Re-seal with a penetrating sealer.
- The shower pan: check for any soft spots, flexing, or discoloration. Look at the drain connection from below if you have access.
- The exhaust fan: full cleaning, damper check, and airflow test. If it’s in the 5 to 8-year window, start planning replacement.
- Stone surfaces: reseal marble, travertine, or any other natural stone, and inspect for etching or dull spots.
- Toilet and sink connections: check for leaks at the supply lines and the base. A small drip left alone for two years causes most of the subfloor damage we see.
- The door and hardware: check that the shower door seal is still intact, hinges haven’t loosened, and the door closes without dragging.
- Ventilation and moisture: look for any mold, mildew, or peeling paint at the corners and ceiling. These are early signs that the exhaust fan or the caulk is underperforming.
If you find something within the 730-day window that’s a workmanship issue, contact your contractor. A genuine warranty covers it. If you find something that’s maintenance, do it now, because material maintenance is the homeowner’s responsibility, and doing it on time protects the warranty. If you’re buying a home with a recent bathroom remodel in Spring Valley, this checklist is also the right set of questions to ask the seller before you close.
Hard Water, Dry Air, and Spring Valley Surfaces
Spring Valley sits in a climate that punishes bathrooms in two specific ways: hard water and low humidity. Both change the maintenance schedule, and neither gets much attention in the generic guides.
Hard water leaves calcium and mineral deposits that bond to grout and stone. Over time, that buildup doesn’t just look bad; it locks into the pores and makes the sealer less effective. The fix is straightforward: wipe down shower walls and stone surfaces after every use, use a squeegee on glass, and deep-clean the grout every 6 months instead of every 12. If you have a water softener, you’ll need to deep-clean less often, but you still need to seal on the standard schedule.
Dry air is the opposite problem. It pulls moisture out of the caulk and grout, causing small cracks to open at the joints. Those cracks are exactly where water gets in when the shower runs. We recommend inspecting every joint in the dry winter months and touching up any fine cracks immediately, using 100% silicone in any wet zone. It’s a five-minute job that prevents a five-figure repair.
Spring Valley’s newer neighborhoods see another pattern: bathrooms built with some of the same modular construction as homes in Summerlin and Henderson, which means more movement at the joints. Older Spring Valley homes have their own rhythm. Either way, the schedule holds. For a full picture of what we build, our work is part of every category of home construction we offer, from kitchen remodels to fence installation in Spring Valley. We also work with Driveway & Pavers in Spring Valley on exterior and whole-home jobs, and the same maintenance discipline applies outdoors.
Common Mistakes to Avoid
- Treating grout and caulk on the same schedule. They have different service lives, and combining them either leaves caulk failing or grout getting resealed unnecessarily. Track them separately.
- Skipping the 6-month silicone inspection. It’s the most skipped step and the most expensive to miss. Set a reminder on your phone for six months after the remodel, then every six months after that.
- Using vinegar or bleach on grout. Both degrade sealer and grout. Use pH-neutral tile cleaner. In Spring Valley’s hard water, a neutral cleaner with a soft brush does the most with the least damage.
- Assuming the exhaust fan still works because it’s still loud. Noise isn’t airflow. Test with a tissue and replace the fan in the 8 to 10-year window.
- Sealing natural stone and porcelain on the same schedule. Marble needs sealing yearly; glazed porcelain doesn’t need it at all. Getting this wrong wastes money or leaves a porous surface unprotected.
- Waiting for a leak to appear on the ceiling below. By the time it’s visible, the repair has grown from a caulk job to a rebuild. Check joints proactively at 6 months and 730 days.
- Not writing down the maintenance dates. Most Spring Valley homeowners who lose track of a remodel’s timeline miss the 6-month and 730-day windows. Track it in your phone from day one.
See the difference
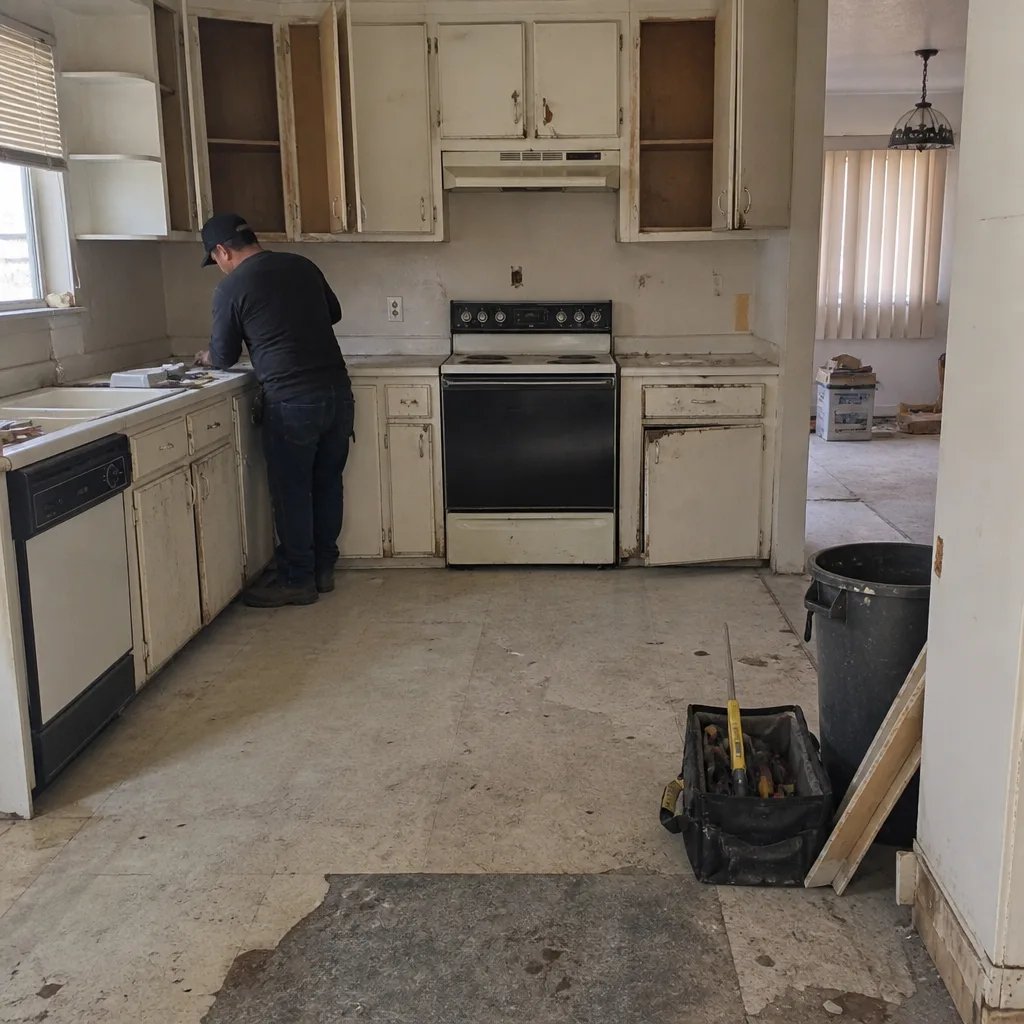 Before
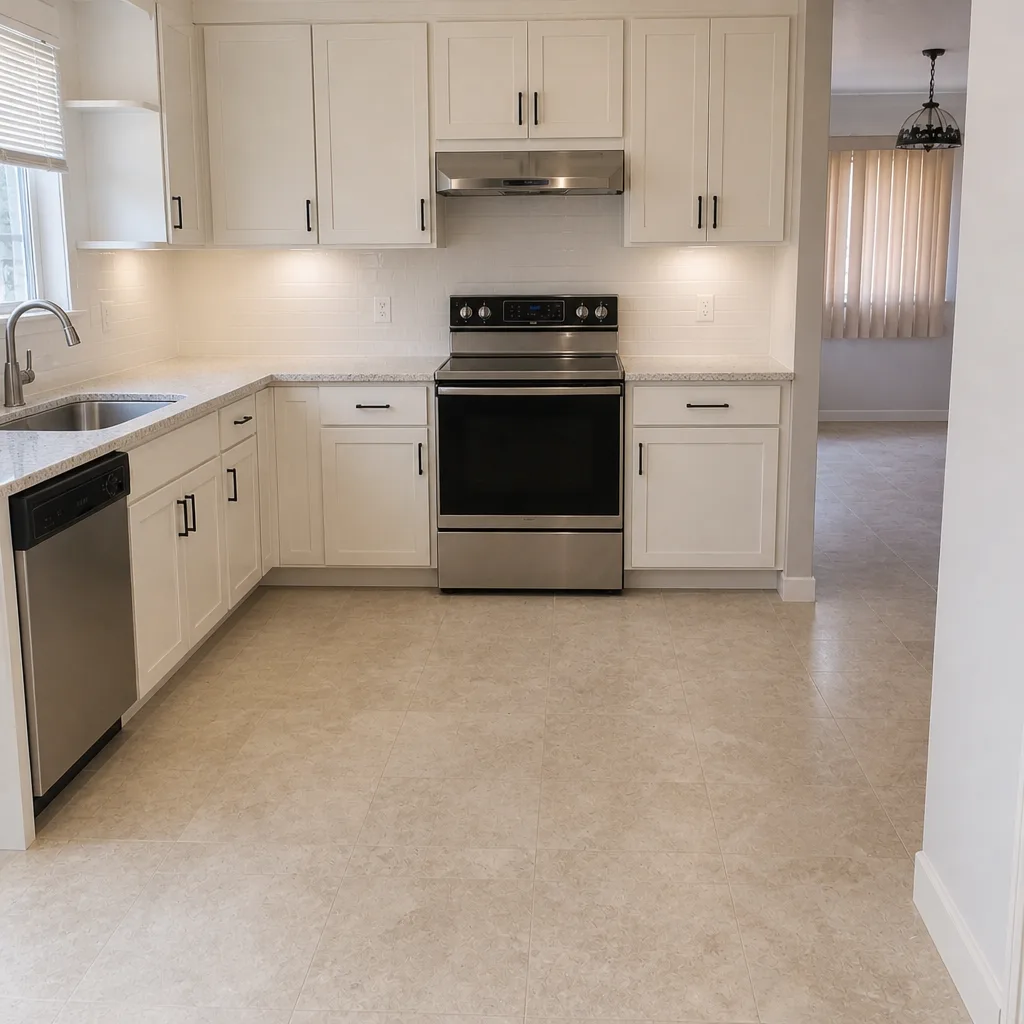 After
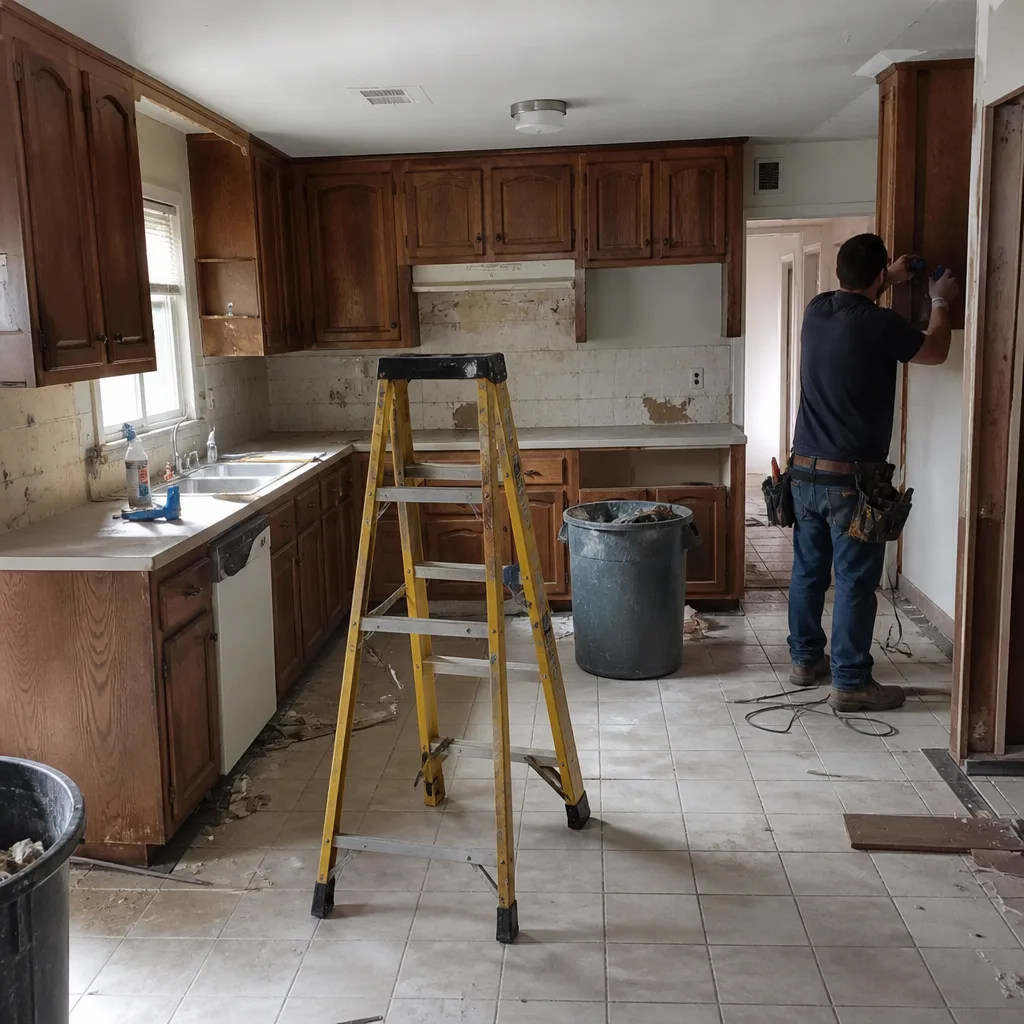 Before
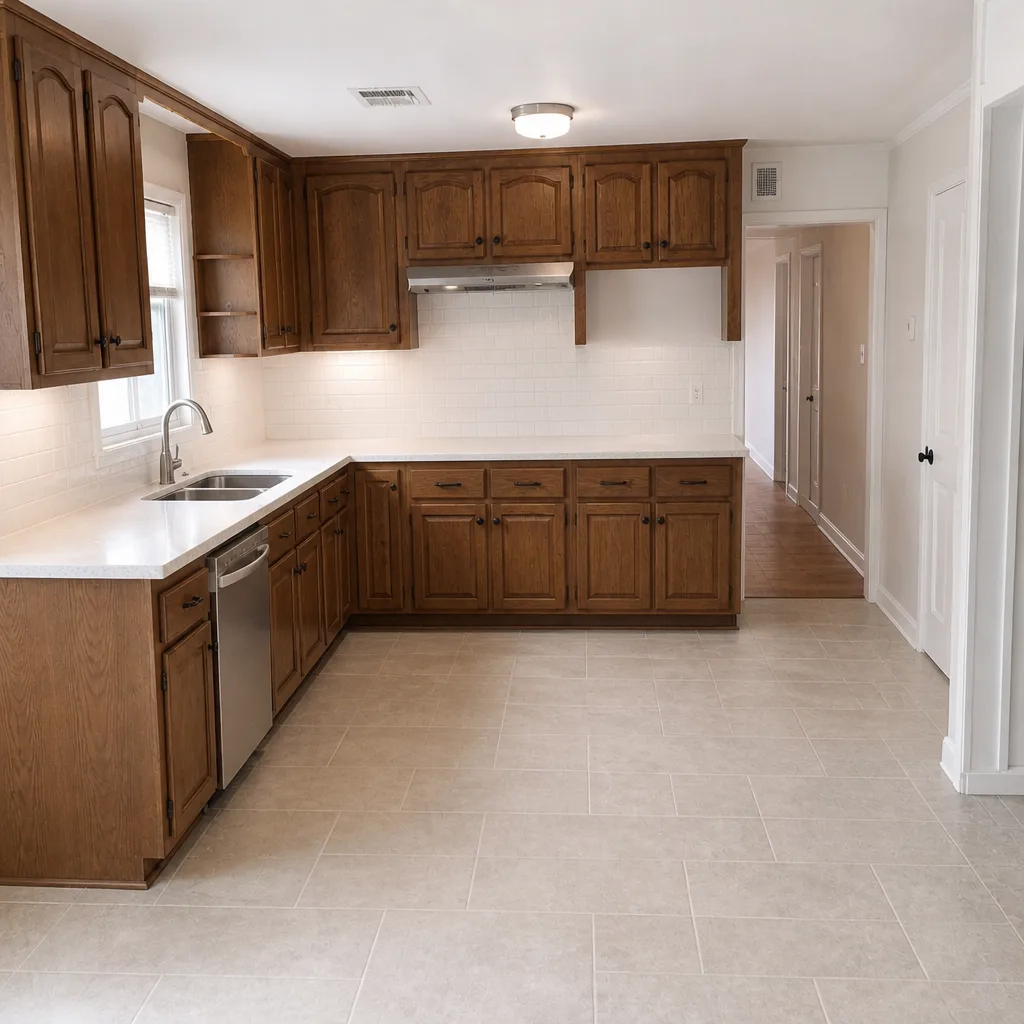 After
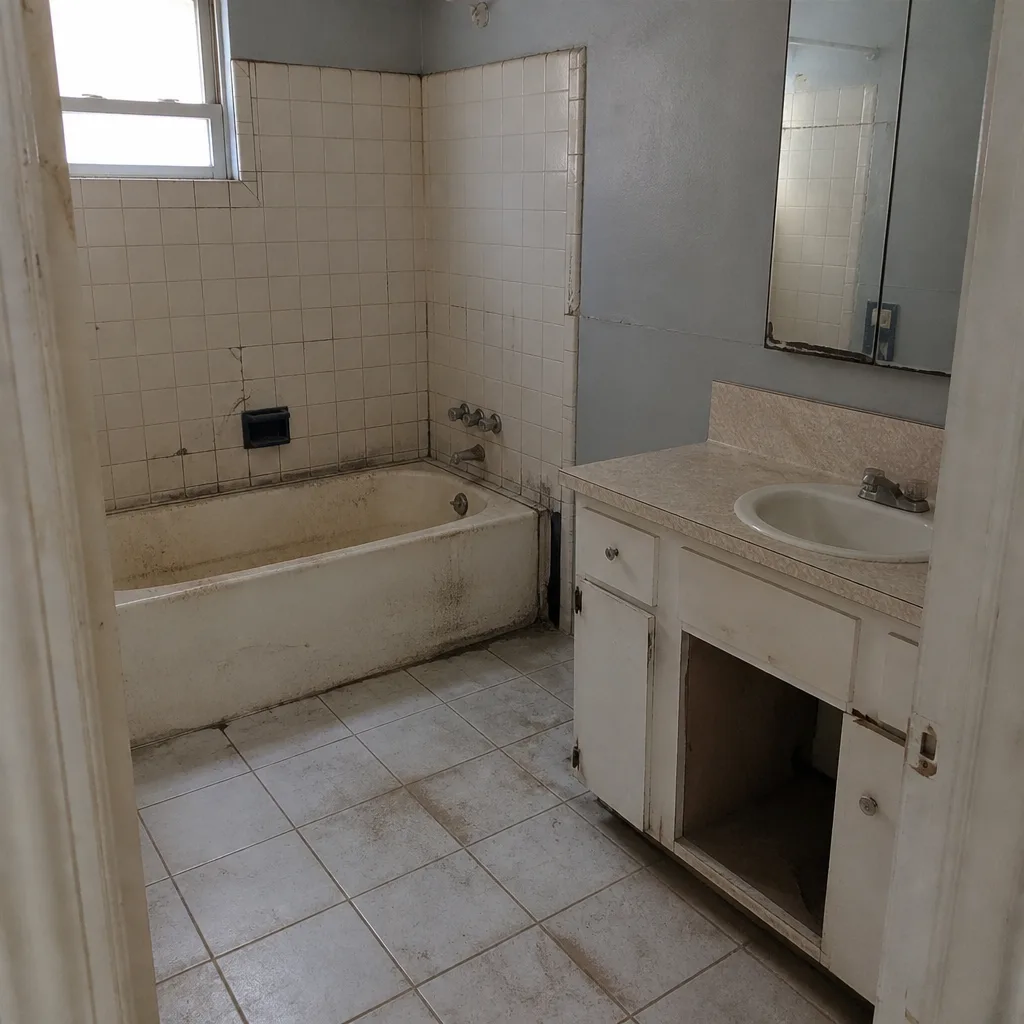 Before
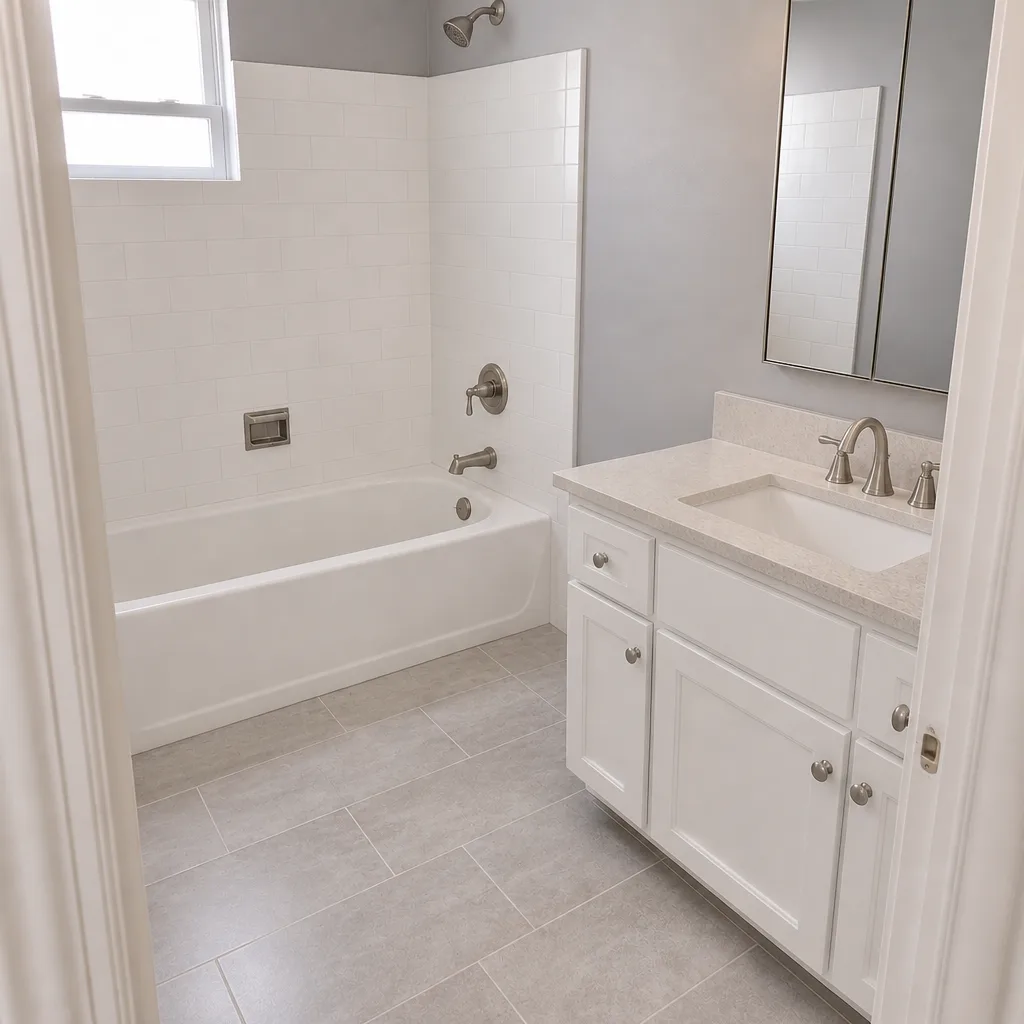 After
When to Call a Professional
Some maintenance is yours to do. Other items need a professional, and it’s worth knowing the line. Call us if you see water staining on the ceiling below the bathroom, if a tile sounds hollow when you tap it, if the shower pan flexes underfoot, or if a drain connection is leaking. Those are signs that water has moved past the surface and into the substrate, and that’s not a caulk job. Replacing a shower pan, rebuilding a wet wall, or tracing a hidden leak in a Spring Valley home are all work for a trained crew.
If you’re planning a remodel rather than repairing one, the best time to think about maintenance is before the tile goes up. Our team walks through the maintenance schedule with every homeowner at project close. If you want a fresh set of eyes on a bathroom that’s starting to show its age, Groundwork Construction Co. of Spring Valley offers free estimates in Spring Valley. Call (888) 329-9414.
Frequently Asked Questions
Reseal grout every 12 to 24 months in a shower and every 12 months on bathroom floors. Re-caulk tub and shower joints every 5 to 7 years, with inspection every 6 months. Spring Valley’s hard water means you should stay at the shorter end of that range; mineral deposits break down sealer faster than soft water does. Call (888) 329-9414 to schedule an inspection if you’re not sure where your bathroom falls.
No. Glazed porcelain is essentially non-porous and doesn’t need sealing; seal only the grout lines every 3 to 5 years. Natural stone like marble, travertine, or limestone needs the full surface sealed every 12 months, and often more frequently in a shower. Treating them the same either wastes money or leaves a porous surface exposed. Call for a free estimate if you want us to identify your surface and recommend the right sealer.
If it’s 8 to 10 years old, replace it. Before that, test airflow by holding a tissue to the running fan; if it doesn’t pull the tissue toward the grill, the fan is underperforming. Clean the grill and blades every 6 months. A declining fan is a leading cause of premature tile failure because moisture stays in the room. Call (888) 329-9414 for a free estimate on a fan replacement.
The 6-month silicone caulk inspection. It’s the step most homeowners skip, and it’s the one that catches a failing joint before water gets behind the tile. It takes 15 minutes and costs nothing. The 730-day checklist is the second most important. If your remodel was done by us, that window is covered by the 730-Day Done Right Promise, but the routine check belongs to you.
It can if you let deposits sit. Hard water mineral buildup etches natural stone and stains grout over time, and the damage is reversible with re-honing for stone but much harder to undo for stained grout. Wipe surfaces after every shower and deep-clean grout every 6 months. Call us if you’re dealing with existing buildup and want an assessment.
Routine maintenance like wiping surfaces, cleaning the exhaust fan, and touching up caulk is well within reach for most homeowners. Structural repairs, shower pan replacement, and hidden leak tracing need a trained crew. If you notice hollow tile, a flexing shower pan, or ceiling stains, call (888) 329-9414 for a free estimate rather than waiting.
The Bottom Line
A bathroom remodel isn’t a finish line; it’s the start of a maintenance schedule that most homeowners never get told about. The materials that make a Spring Valley bathroom beautiful (grout, caulk, natural stone, porcelain, an exhaust fan) all have different service lives, and the work is to run them on their own timelines. The 6-month silicone inspection and the 730-day checklist are the two dates that protect everything else. Do the routine work and you’ll have a bathroom that still looks like the day of the final walkthrough a decade from now. Skip it and the repair bill will tell the story instead.
If you want a free estimate on a new bathroom, or a professional walkthrough on a bathroom you’re worried about, call Groundwork Construction Co. of Spring Valley at (888) 329-9414. Calls are answered by a live person, 24/7. Our background-checked, uniformed technicians have up to 12 years of experience, and every project is covered by the 730-Day Done Right Promise. From foundation to finish line, we build bathrooms that hold up.
Written by the team at Groundwork Construction Co. of Spring Valley.